Wooden Squat Rack: Build Tips and Floor Protection
Why Choose a Wooden Squat Rack for Home Training?
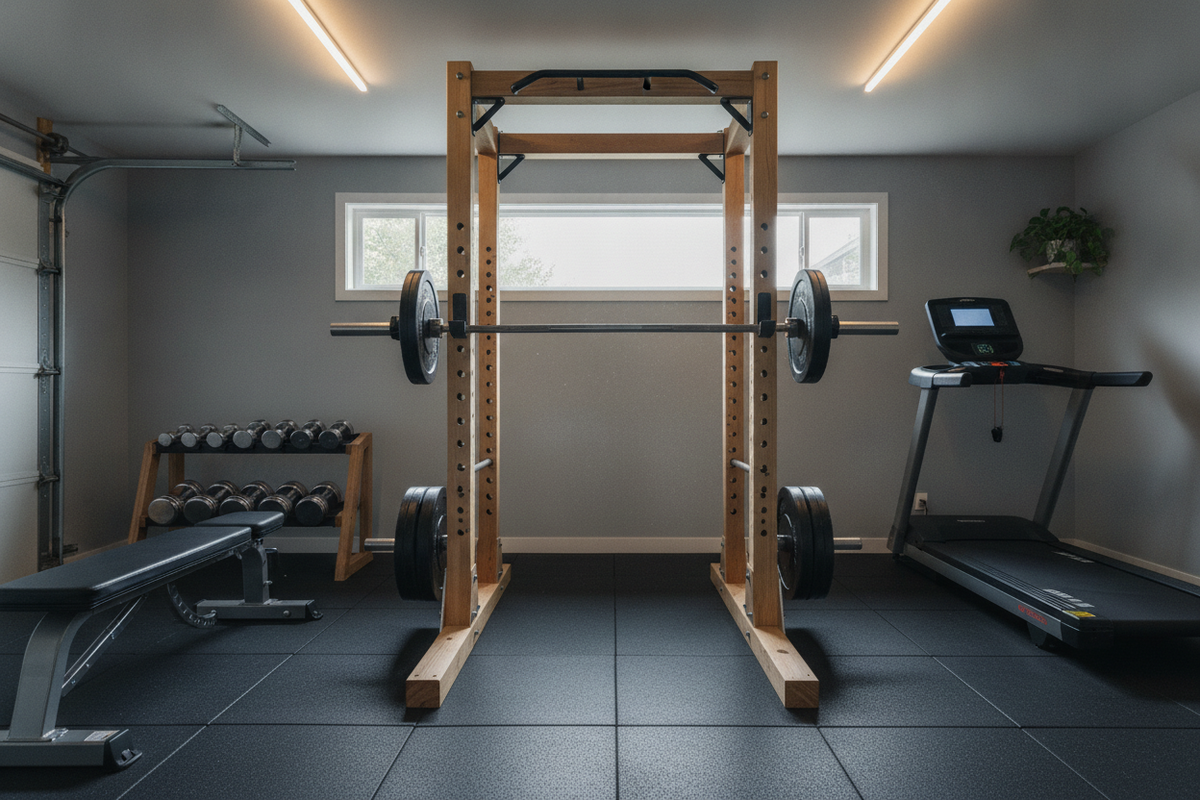
Building a home workout space often comes down to balancing floor space, training needs, and equipment availability. While manufactured metal gym racks are common, building a wooden squat rack or a complete timber power rack has become a favored option for DIY enthusiasts and lifters who want custom dimensions. A wood frame allows you to tailor your rack to unusual basement ceiling heights, sloped attic walls, or tight garage bays where commercial models simply will not fit.
Working with timber also gives you full control over your layout. You can craft anything from basic squat stands for simple barbell work to a full four-post wooden power rack with integrated storage and pull-up attachments. Lifters who prefer a warm, natural aesthetic often find that finished wood blends more comfortably into residential rooms than industrial steel. Before committing to timber, it helps to read through a detailed wooden power rack guide to weigh the pros and cons of lumber against commercial alternatives.
Planning Your DIY Squat Rack: Cut List and Core Materials
A reliable DIY squat rack starts with thoughtful lumber selection. Soft framing lumber can work well if you select straight, knot-free pieces, while laminated structural posts or clear framing boards provide excellent stability under vertical loads. Warped boards will create an out-of-square frame that rocks during barbell re-racks, so spend extra time at the lumber yard sorting for straight grain.
Before buying timber, draft an accurate cut list. Map out your upright heights, base spreaders, overhead crossmembers, and diagonal gussets. Having a planned cut list keeps your total cost predictable and prevents wasted material. For builders who prefer off-the-shelf equipment, exploring a dedicated gym rack collection can provide inspiration for standard dimensions, barbell clearance, and upright spacing.
Key tools for this build include:
- A reliable circular saw or miter saw for square crosscuts
- A cordless drill and quality driver bits for fasteners
- A drill press or sturdy handheld drill guide to bore perpendicular pin holes
- A framing square and bubble level to keep all joints true
- Protective work gear including eye protection and dust masks
Safety Hardware, Spotter Arms, and Pull Up Bar Integration
Hardware quality is just as important as lumber selection when building a DIY power rack. Relying solely on wood screws or nails is never recommended for weight-bearing joints. Framing uprights and base runners should be fastened together with heavy through-bolts, washers, and locking nuts to prevent joint loosening over repeated loading cycles. Adding steel corner braces or thick plywood gusset plates at every corner dramatically improves lateral stiffness.
If you train alone, reliable spotter arms or horizontal safety pipes are mandatory. Wood spotter arms reinforced with metal brackets or heavy-gauge steel pipe run through bored holes will catch a missed lift and protect you from injury. When boring upright holes for J-hooks and spotters, keep uniform hole spacing so your barbell sits level across both posts.
Integrating a pull up bar across the top crossmembers adds functional training value without consuming additional floor space. A length of threaded steel plumbing pipe secured with matching floor flanges makes an exceptional bar that bolts straight into the wooden uprights. If you are debating between standalone wood squat stands and a full cage, reviewing a gym power rack collection can help you decide how much overhead framing your space can comfortably handle.
Squat Rack Floor Protection for Heavy Timber Bases
One aspect often overlooked in DIY gym projects is squat rack floor protection. A loaded wooden squat rack exerts substantial downward force across its base runners. Without proper home gym squat rack flooring, shifting timber can gouge hardwood, crack vinyl planks, or grind abrasive grit into concrete subfloors.
Standard thin yoga mats or lightweight EVA foam tiles compress completely under heavy timber, leaving your subfloor vulnerable to point loads. Dense, high-density rubber matting is the gold standard for rack bases because it absorbs vibration, prevents shifting during aggressive barbell re-racks, and will not permanently pancake under sustained pressure. Placing a continuous gym flooring product directly beneath the wooden frame also creates an anti-slip platform for your lifting shoes, keeping your stance secure while squatting and pressing.
For rooms with sensitive flooring like luxury vinyl plank or engineered hardwood, rubber matting acts as a buffer that prevents localized crushing and moisture buildup beneath the timber runners. Investing in durable floor protection preserves your property while stabilizing your entire training setup.
Assembly Steps, Leveling, and Final Touches
Assemble your rack on a flat, even surface. Build the two side upright ladders first, fastening the horizontal spreaders and squaring every joint with a framing square. Once the two sides are rigid, connect them with the front and rear crossmembers. Always pre drill pilot holes before driving structural screws or through-bolts to keep the wood grain from splitting near the ends of boards.
Most residential garages have sloped concrete floors designed to direct water toward the door. If your rack sits on an uneven grade, level the base runners using dense rubber shims or trimmed hardwood wedges so the uprights stand plumb. Check your frame with a level from front to back and side to side before securing the final braces.
Adding careful final touches extends the life of your timber build. Sand down rough edges and drilled pin holes to prevent splinters during daily workouts. A coat of exterior stain, water-based polyurethane, or clean enamel paint protects the timber from sweat, humidity changes, and garage moisture. If you want to compare your finished build against commercial designs, read through a power squat rack guide to see how DIY setups match up with manufactured power cages.
Frequently Asked Questions About Wooden Squat Racks
Is EVA foam or rubber better for a gym floor?
Dense rubber is much better suited for squat racks and heavy strength training than EVA foam. Foam tiles compress easily under heavy equipment and can shift or tear underfoot during compound lifts. High-density rubber maintains its shape, absorbs mechanical shock, and provides a stable, non-slip footing for heavy training.
Can exercise mats be used on vinyl plank floors?
Yes, but you should select mats designed not to bleed oils, plasticizers, or color into the vinyl surface. High-density rubber mats distribute equipment weight across several planks, preventing seams from breaking or surface layers from indenting under concentrated timber loads.
How do you keep a wooden squat rack from sliding when reracking?
Placing the rack on a textured rubber gym mat creates significant friction that helps keep the frame planted. Adding diagonal cross-braces, anchoring the rear base runners to a sheet of lifting plywood, or adding weight storage pegs on the rear uprights will also keep the frame securely anchored during re-racks.