Home Gym Power Rack
A home gym power rack is the central piece of strength equipment for safe squats, bench presses, deadlift variations, and pull ups. This guide helps you navigate the overwhelming number of options and pick the right one for your space, budget, and training goals without second-guessing your decision.
For long-term compatibility with attachments from major brands like Rogue, REP, and Bells of Steel, prioritize 3”x3” (or 75x75mm) uprights with 5/8” or 1” holes and standard hole spacing such as Westside pattern. This single decision will save you headaches and money when you want to expand your setup later.
Most serious home lifters in 2025-2026 should aim for at least 11-12 gauge steel, a 700-1,000+ lb weight rating, and a footprint that fits their ceiling height and available floor space. Compromising on these fundamentals to save a few dollars often leads to upgrading twice.
All-in-one racks with cables, landmine, and dip bars (like Force USA MyRack or Major Fitness PLM03) can replace multiple machines and save floor space, but may trade off attachment compatibility and raw structural heaviness compared to dedicated power cages.
By the end of this article, you’ll have specific model examples, a buying checklist, and answers to common questions so you can confidently purchase a rack in one sitting.
What Is a Home Gym Power Rack and Why It Matters
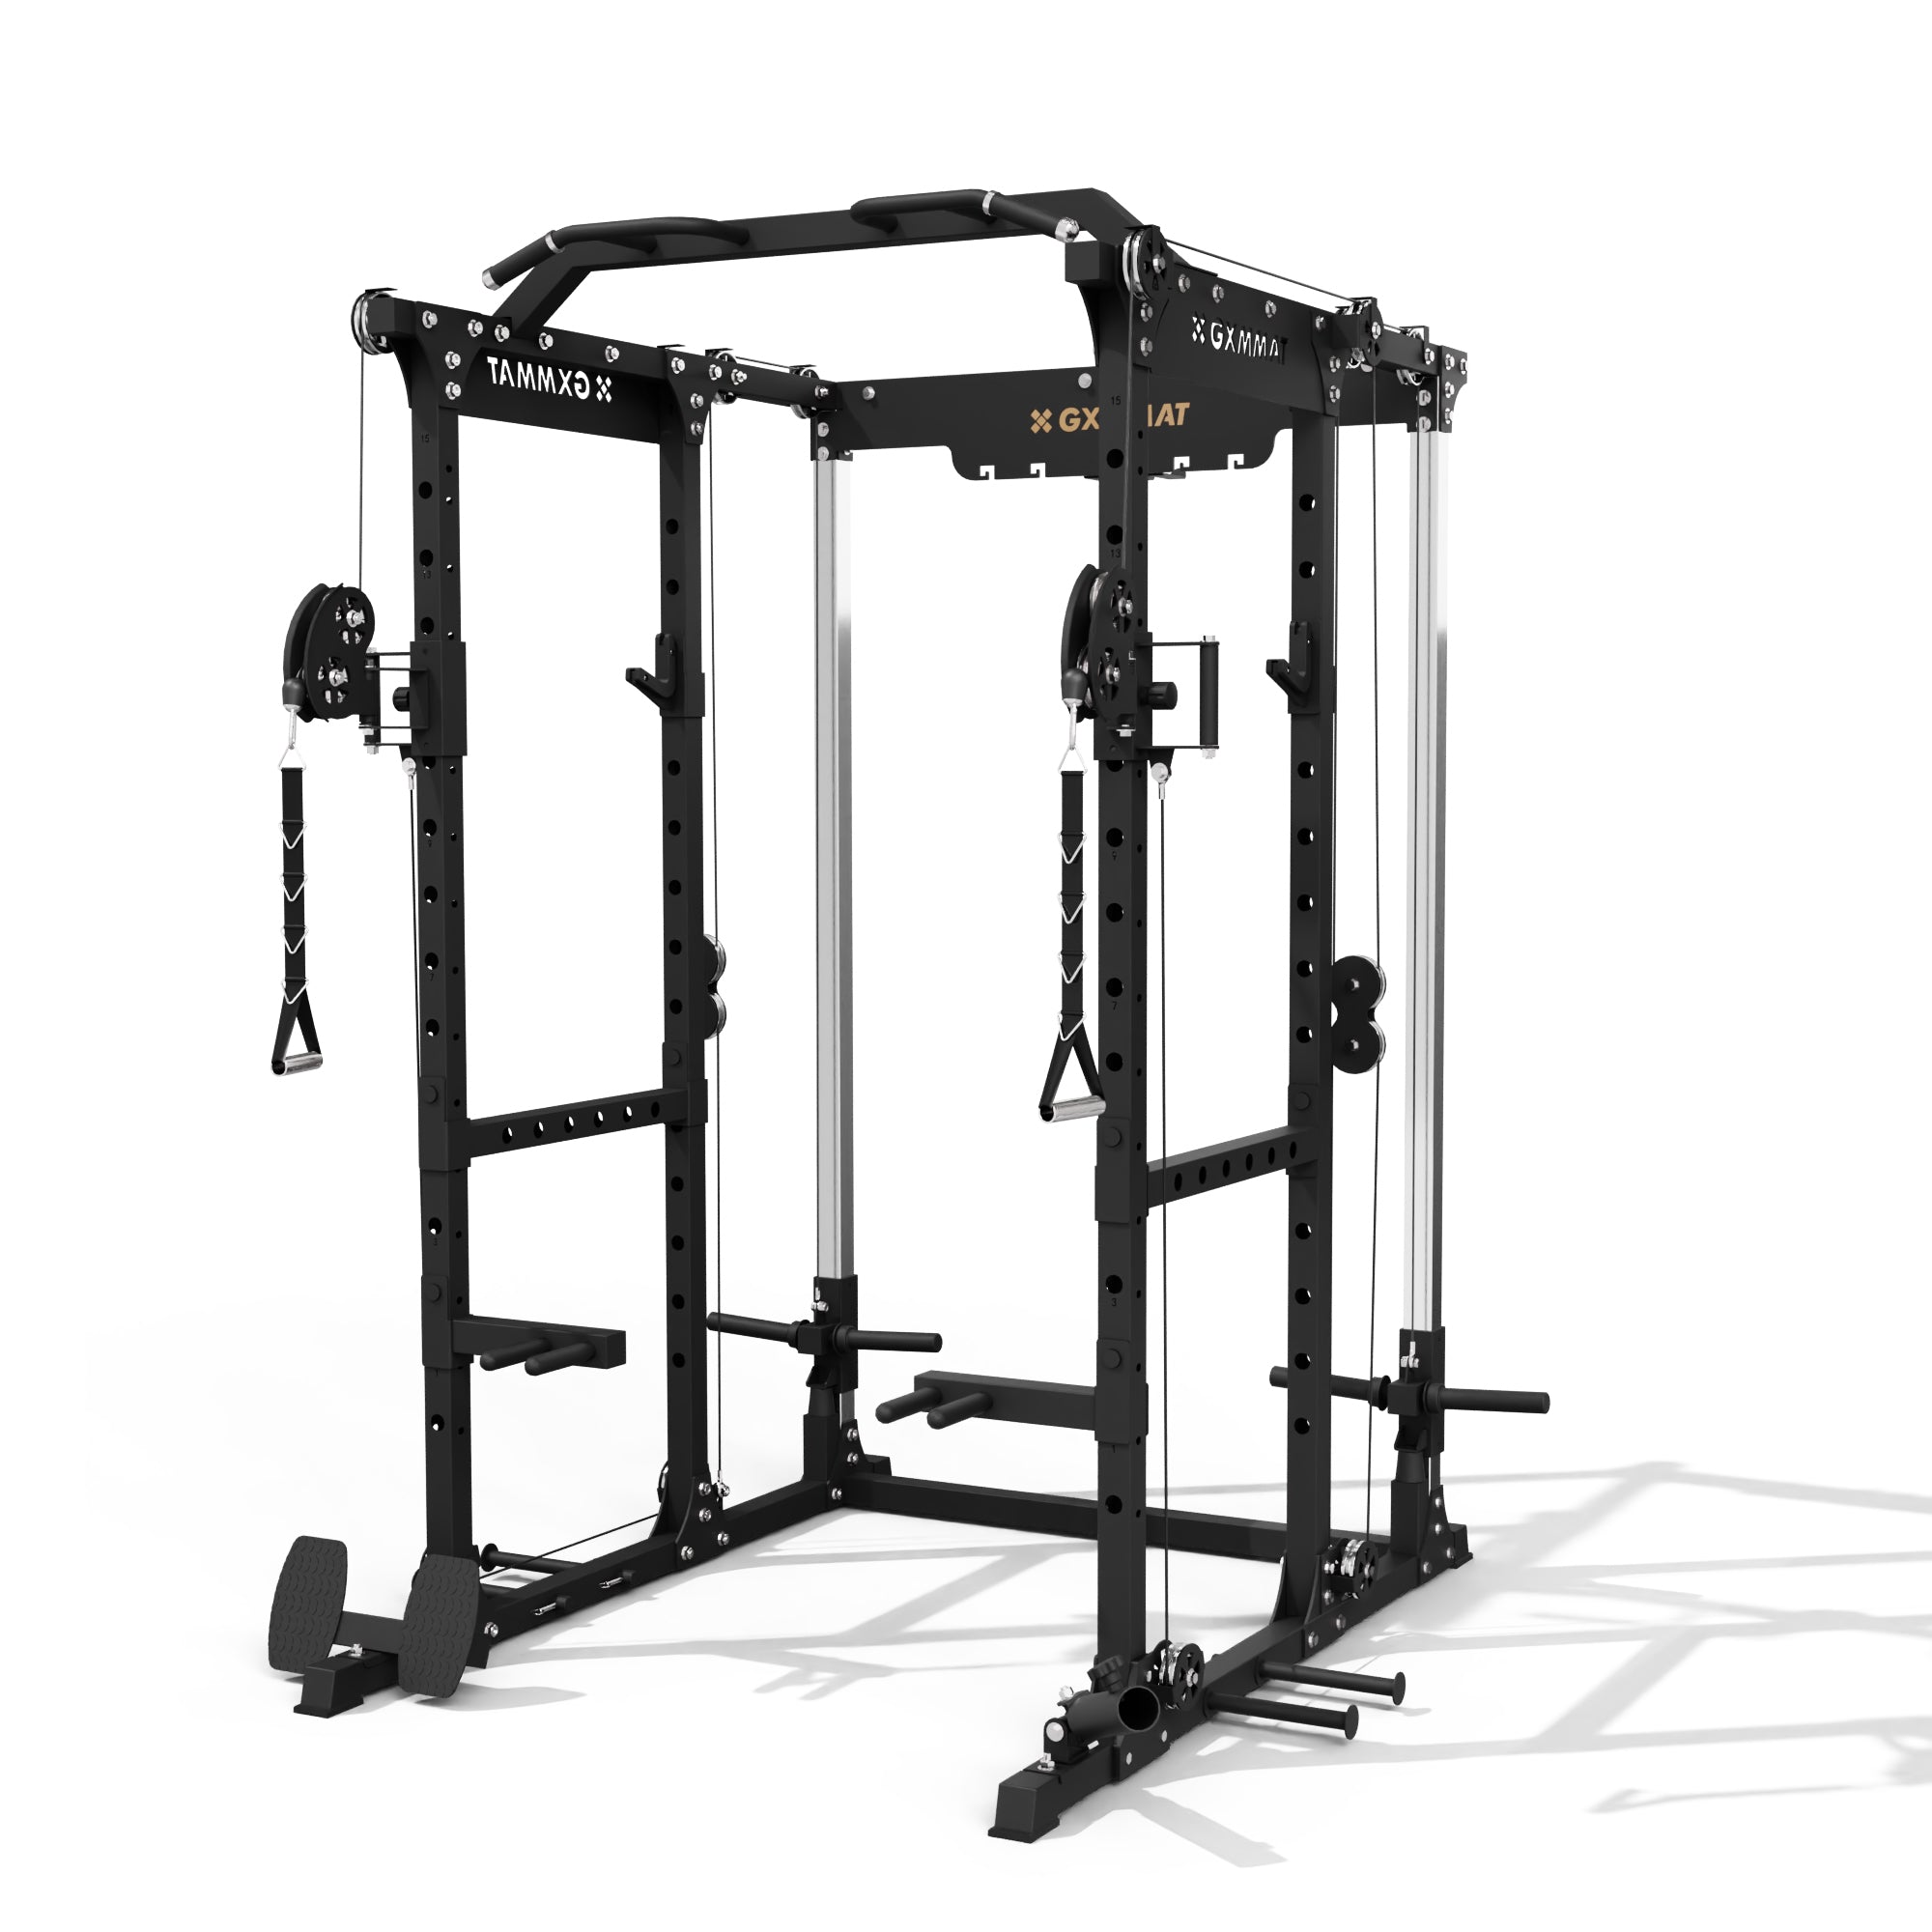
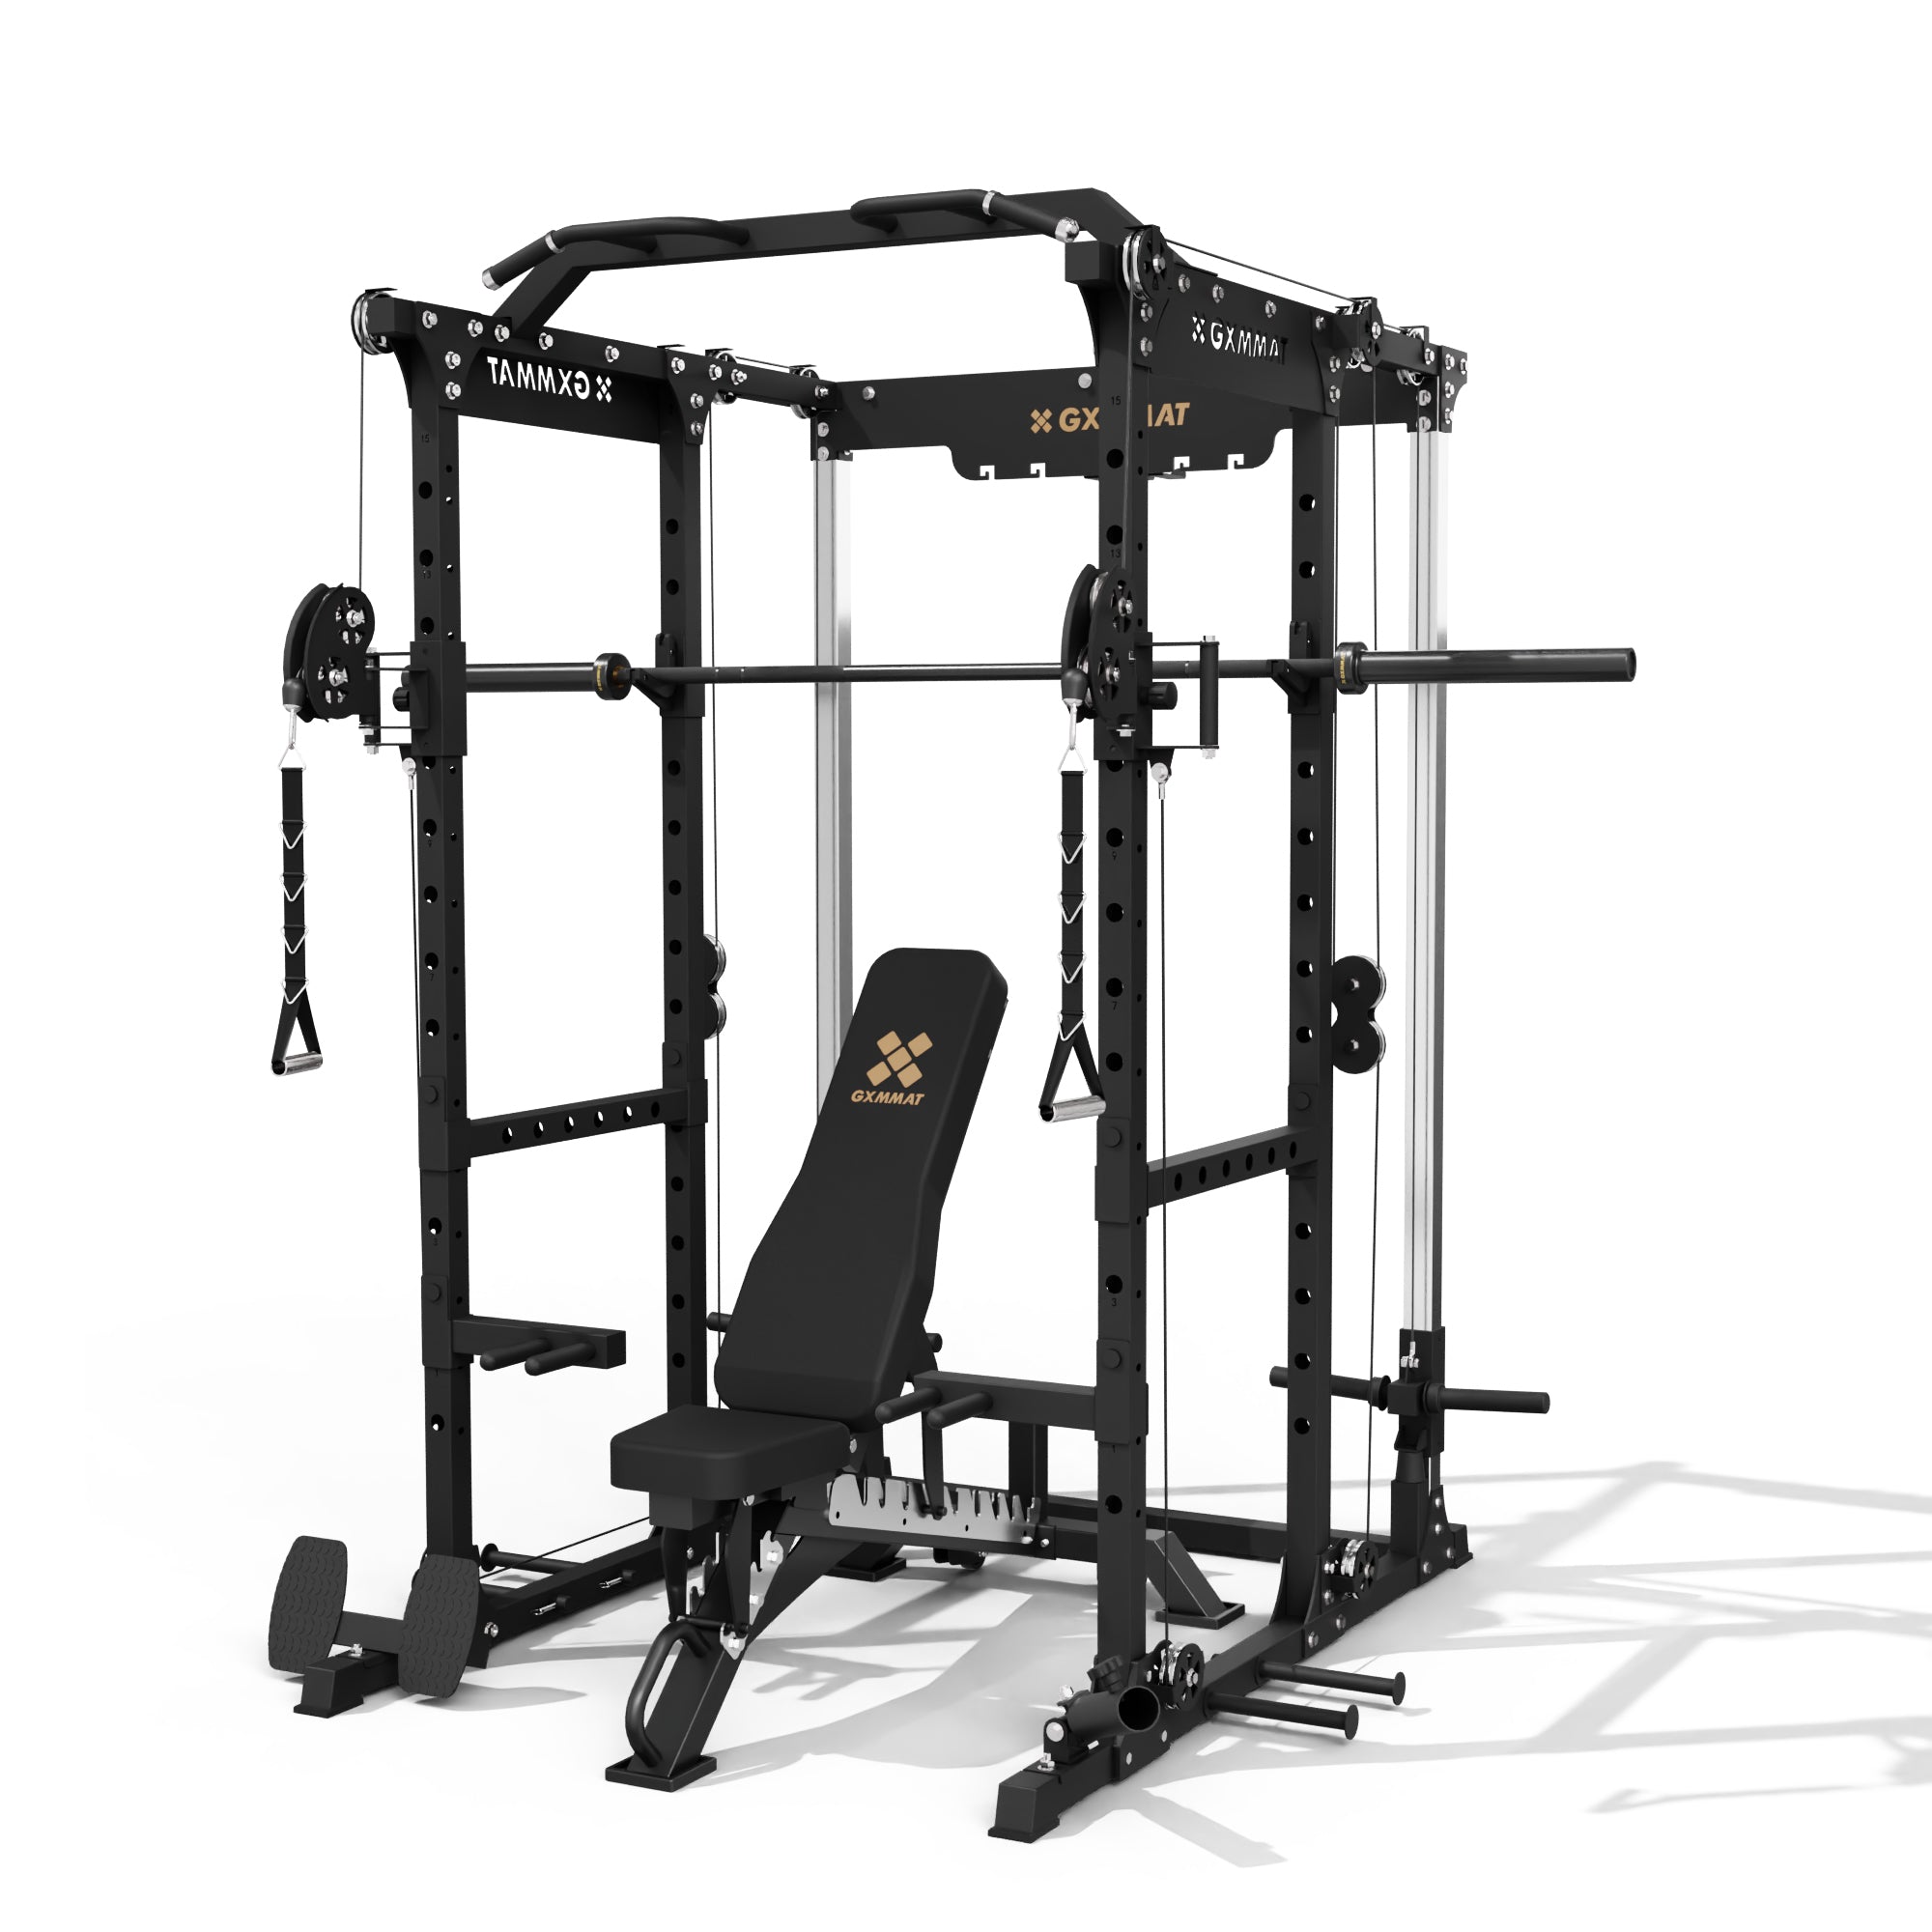
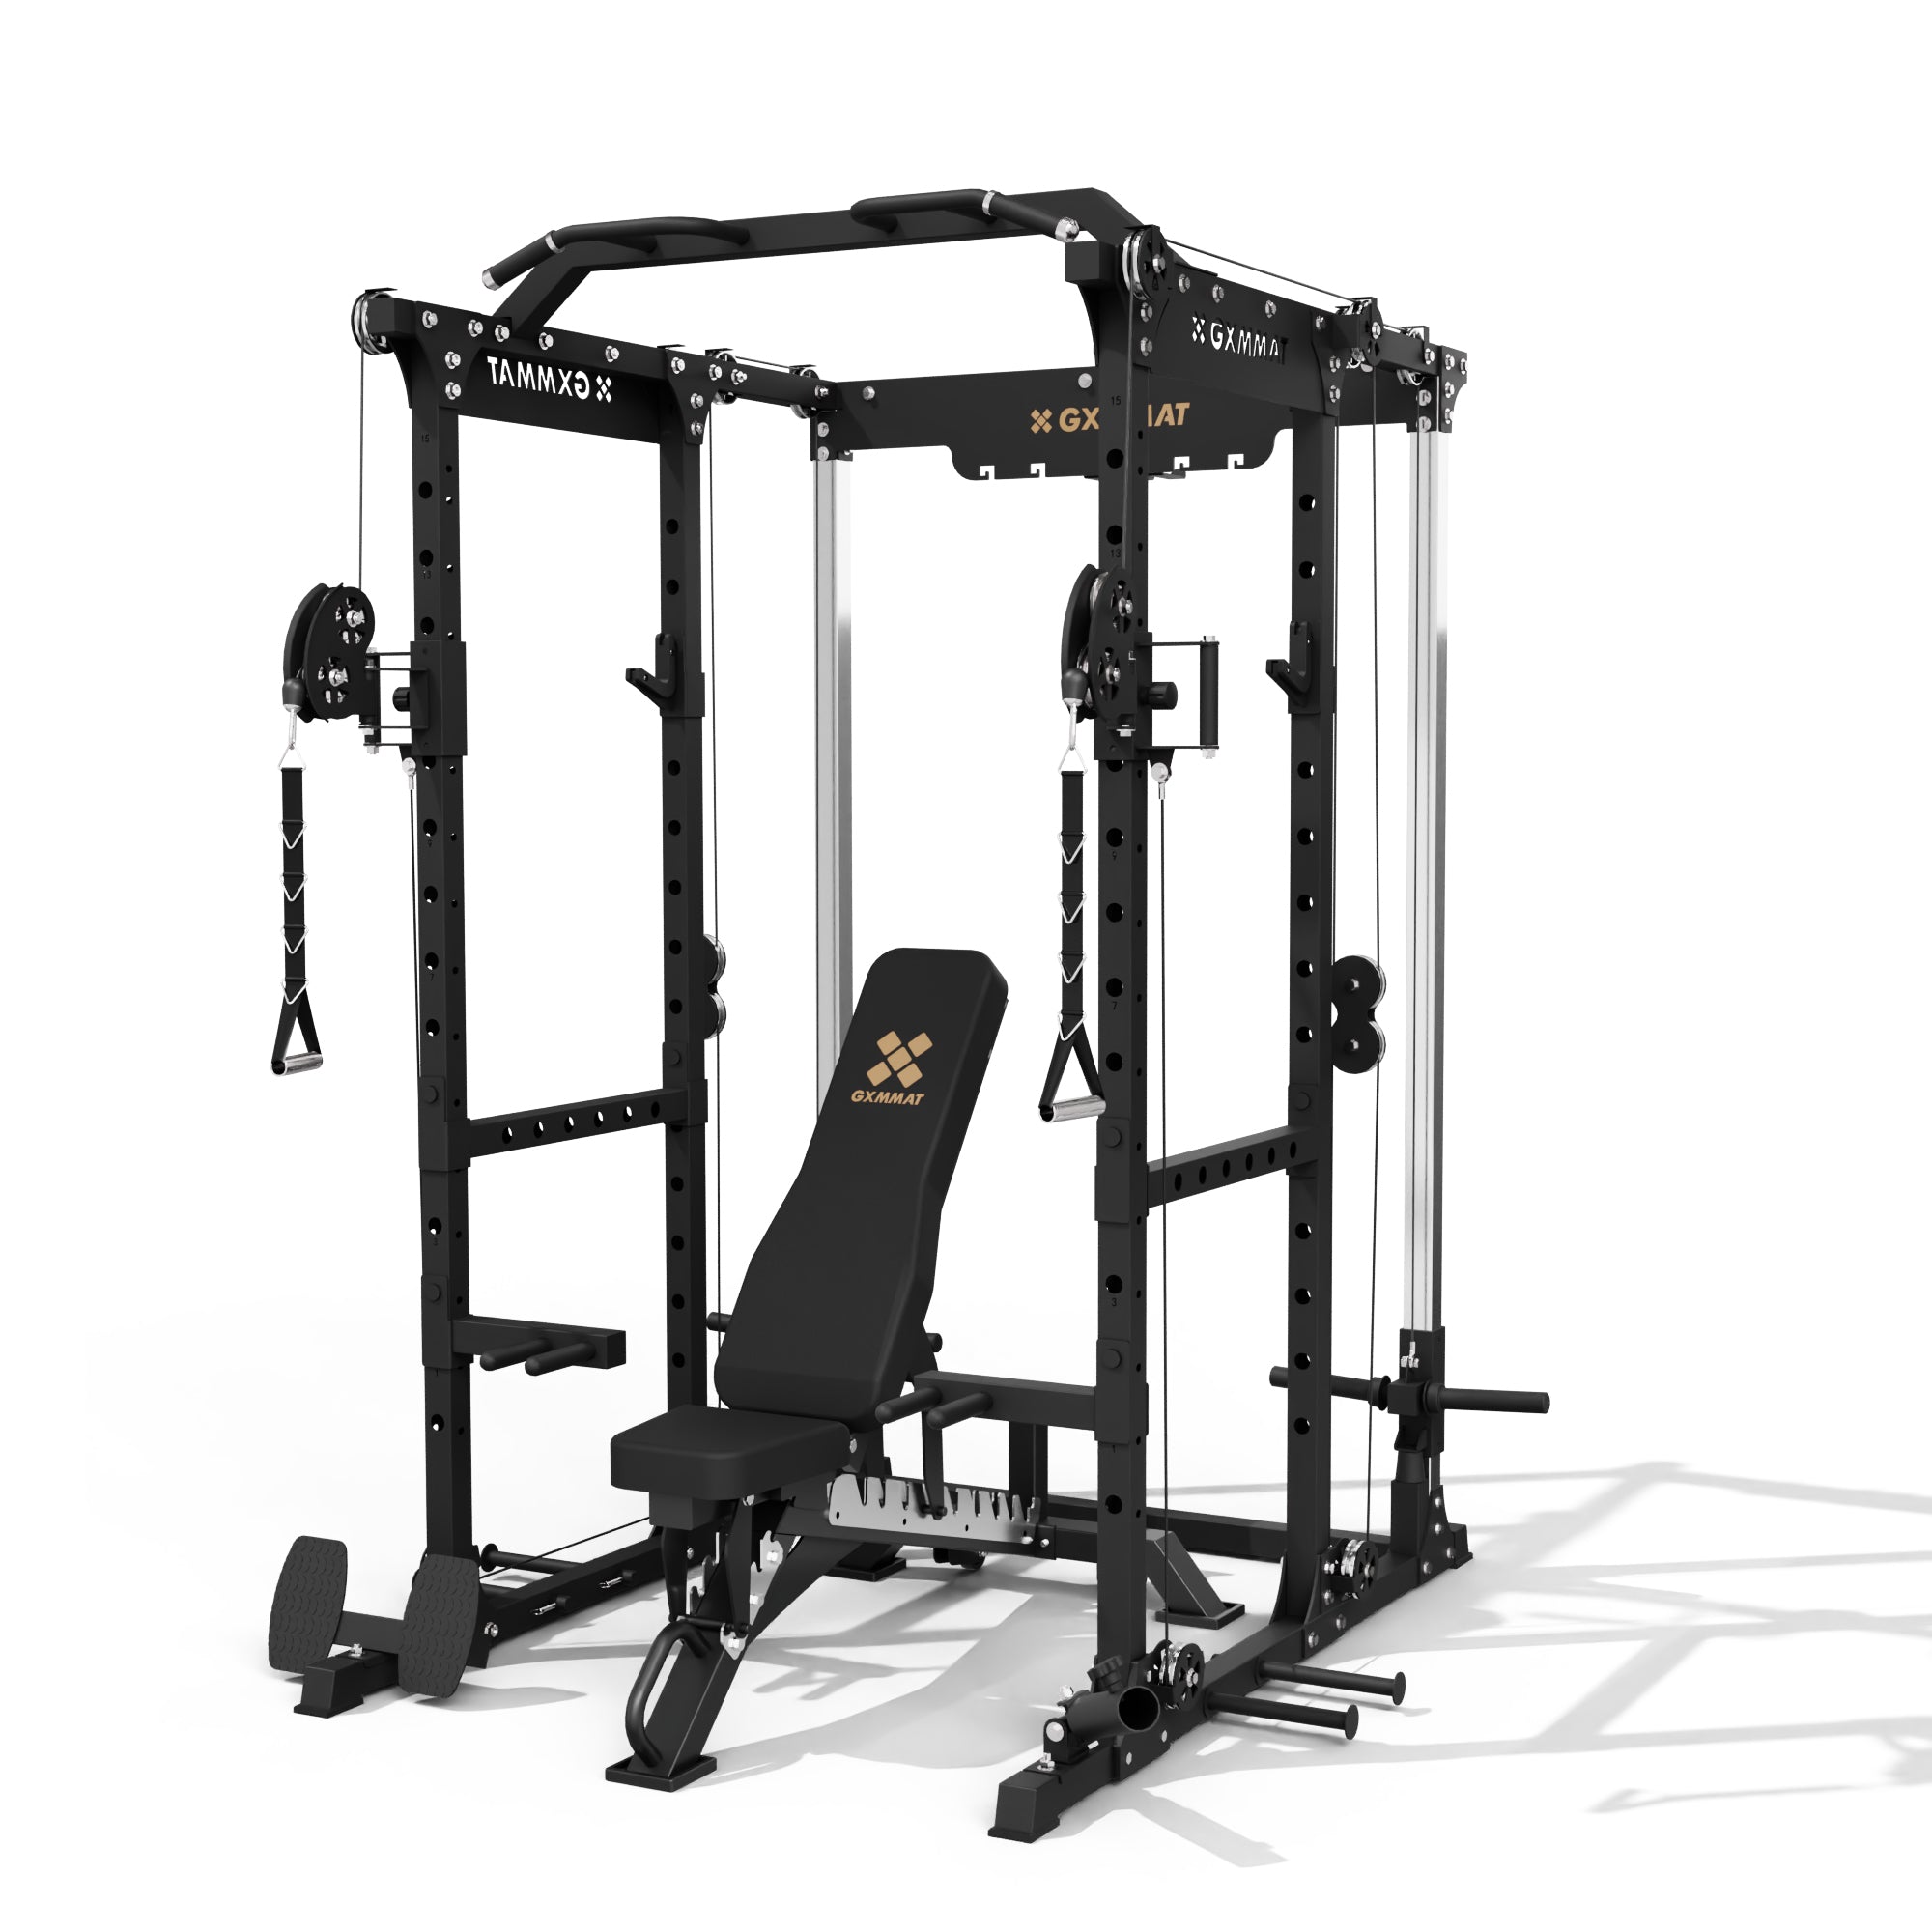
A power rack is a freestanding steel structure with four vertical uprights connected by horizontal crossmembers, designed to let you train heavy barbell movements safely without a human spotter. Take a look at our X6 home gym power rack. Unlike a simple squat stand or a smith machine with its fixed bar path, a power rack surrounds you with adjustable safety mechanisms that catch the bar if you fail a lift.
In a typical 2025-2026 home gym, the power rack functions as the training hub. You’ll use it for back squats, front squats, bench press, overhead press, rack pulls, and pull ups. With the right attachments, you can add cable exercises, dips, landmine work, and more without buying separate pieces of equipment.
The terminology can get confusing. Here’s the quick breakdown:
|
Term |
What It Means: See our Products for a variety of fitness equipment and accessories. |
|---|---|
|
Power rack / Power cage |
A full 4-post structure that encloses the lifter |
|
Squat stand |
Minimal uprights without full enclosure or built-in safeties |
|
Half rack |
Two front uprights with rear bracing and spotter arms |
|
Smith machine |
Fixed bar path on rails, not true free-weight training |
The key advantage for home gym owners is safety during solo lifting. Properly set safeties catch failed reps on squats or bench, which matters enormously when you’re training alone at 6 AM in your garage gym.
Modern racks from brands like REP, Rogue, Titan Fitness, Bells of Steel, and Force USA have evolved into modular systems. You start with a base frame and can add attachments over years as your budget and training needs expand.

Quick Start: What to Look for First When Buying a Home Gym Power Rack
If you want to make a solid purchasing decision in under 10 minutes, here’s your checklist.
Measure your space first
Before shopping, grab a tape measure. You need to know:
-
Ceiling height (critical for pull ups and overhead pressing)
-
Usable floor space (length x width of your training area)
-
Clearance for a 7-foot barbell (84” total length plus room to load plates)
-
Walking space around the rack for safety and comfort
Baseline specs for most home lifters
-
Uprights: 3”x3” (75x75mm) for maximum attachment compatibility
-
Steel gauge: 11-12 gauge (11-gauge is roughly 3mm thick)
-
Hardware: 5/8” or 1” diameter holes
-
Weight capacity: 700-1,000+ lb minimum
-
Rack depth: 24-41” depending on available space
Plan for future attachments
If you ever want to add a lat pulldown, cable crossover, belt squat, or specialty J-hooks, buy a rack with common tubing sizes and hole patterns. Unique dimensions lock you into one brand’s ecosystem and limit your options.
Three fast-track choices by category
|
Category |
Example Models |
Key Features |
|---|---|---|
|
Best overall 4-post |
REP PR-4000, Bells of Steel Hydra |
3”x3” 11-gauge, Westside spacing, huge attachment ecosystem |
|
Budget friendly under $700 |
Titan T-3 Flat Foot, Bells of Steel residential rack |
2”x3” or 3”x3”, 11-12 gauge, solid value |
|
Compact/foldable |
PRx Profile PRO, REP PR-4100 |
Wall mounted options that fold flat when not in use |
Key Types of Racks for a Home Gym
There is no single “best” rack for everyone. The right choice depends on your training style, available floor space, ceiling height, and budget. Here’s what you need to know about each category.
4-Post Power Racks (Full Cages)
The classic power cage has two front and two rear uprights forming a rectangular structure. You train inside the cage with safeties set to catch failed lifts.
Pros:
-
Maximum safety with full enclosure
-
Best stability, especially when bolted down
-
Largest attachment ecosystem
-
Ideal for heavy squats, bench, and rack work
Cons:
-
Larger footprint than half racks or stands
-
Height can be an issue with low ceilings
-
May require drilling to floor for full stability
For most serious home gym enthusiasts pursuing strength training, a 4-post rack is the right foundation.
Half Racks and Squat Stands
A half rack uses two primary uprights with rear bracing and spotter arms extending forward. Squat stands are even more minimal—essentially two independent posts.
Pros:
-
Smaller footprint, easier to fit in tight spaces
-
More open feel for movements like overhead press
-
Often includes integrated plate storage on rear uprights
-
Generally less expensive than full cages
Cons:
-
Less built-in safety containment
-
May tip under heavy loads without bolting or weight storage
-
Fewer attachment options than full racks
Examples include the Rogue HR-2 and Titan T-3 half rack configurations.
Wall-Mounted and Folding Racks
These racks attach to your wall and fold flat when not in use. They’re popular for garage gyms where cars need to park.
Pros:
-
Reclaim floor space when not training
-
Can be robust enough for heavy loads when properly installed
-
Ideal for multipurpose spaces
Cons:
-
Require solid wall mounting (studs or concrete)
-
Less rack depth limits some movements
-
Fewer attachment options than freestanding cages
-
Setup and takedown adds time to sessions
The PRx Profile PRO and similar folding wall racks dominate this category.
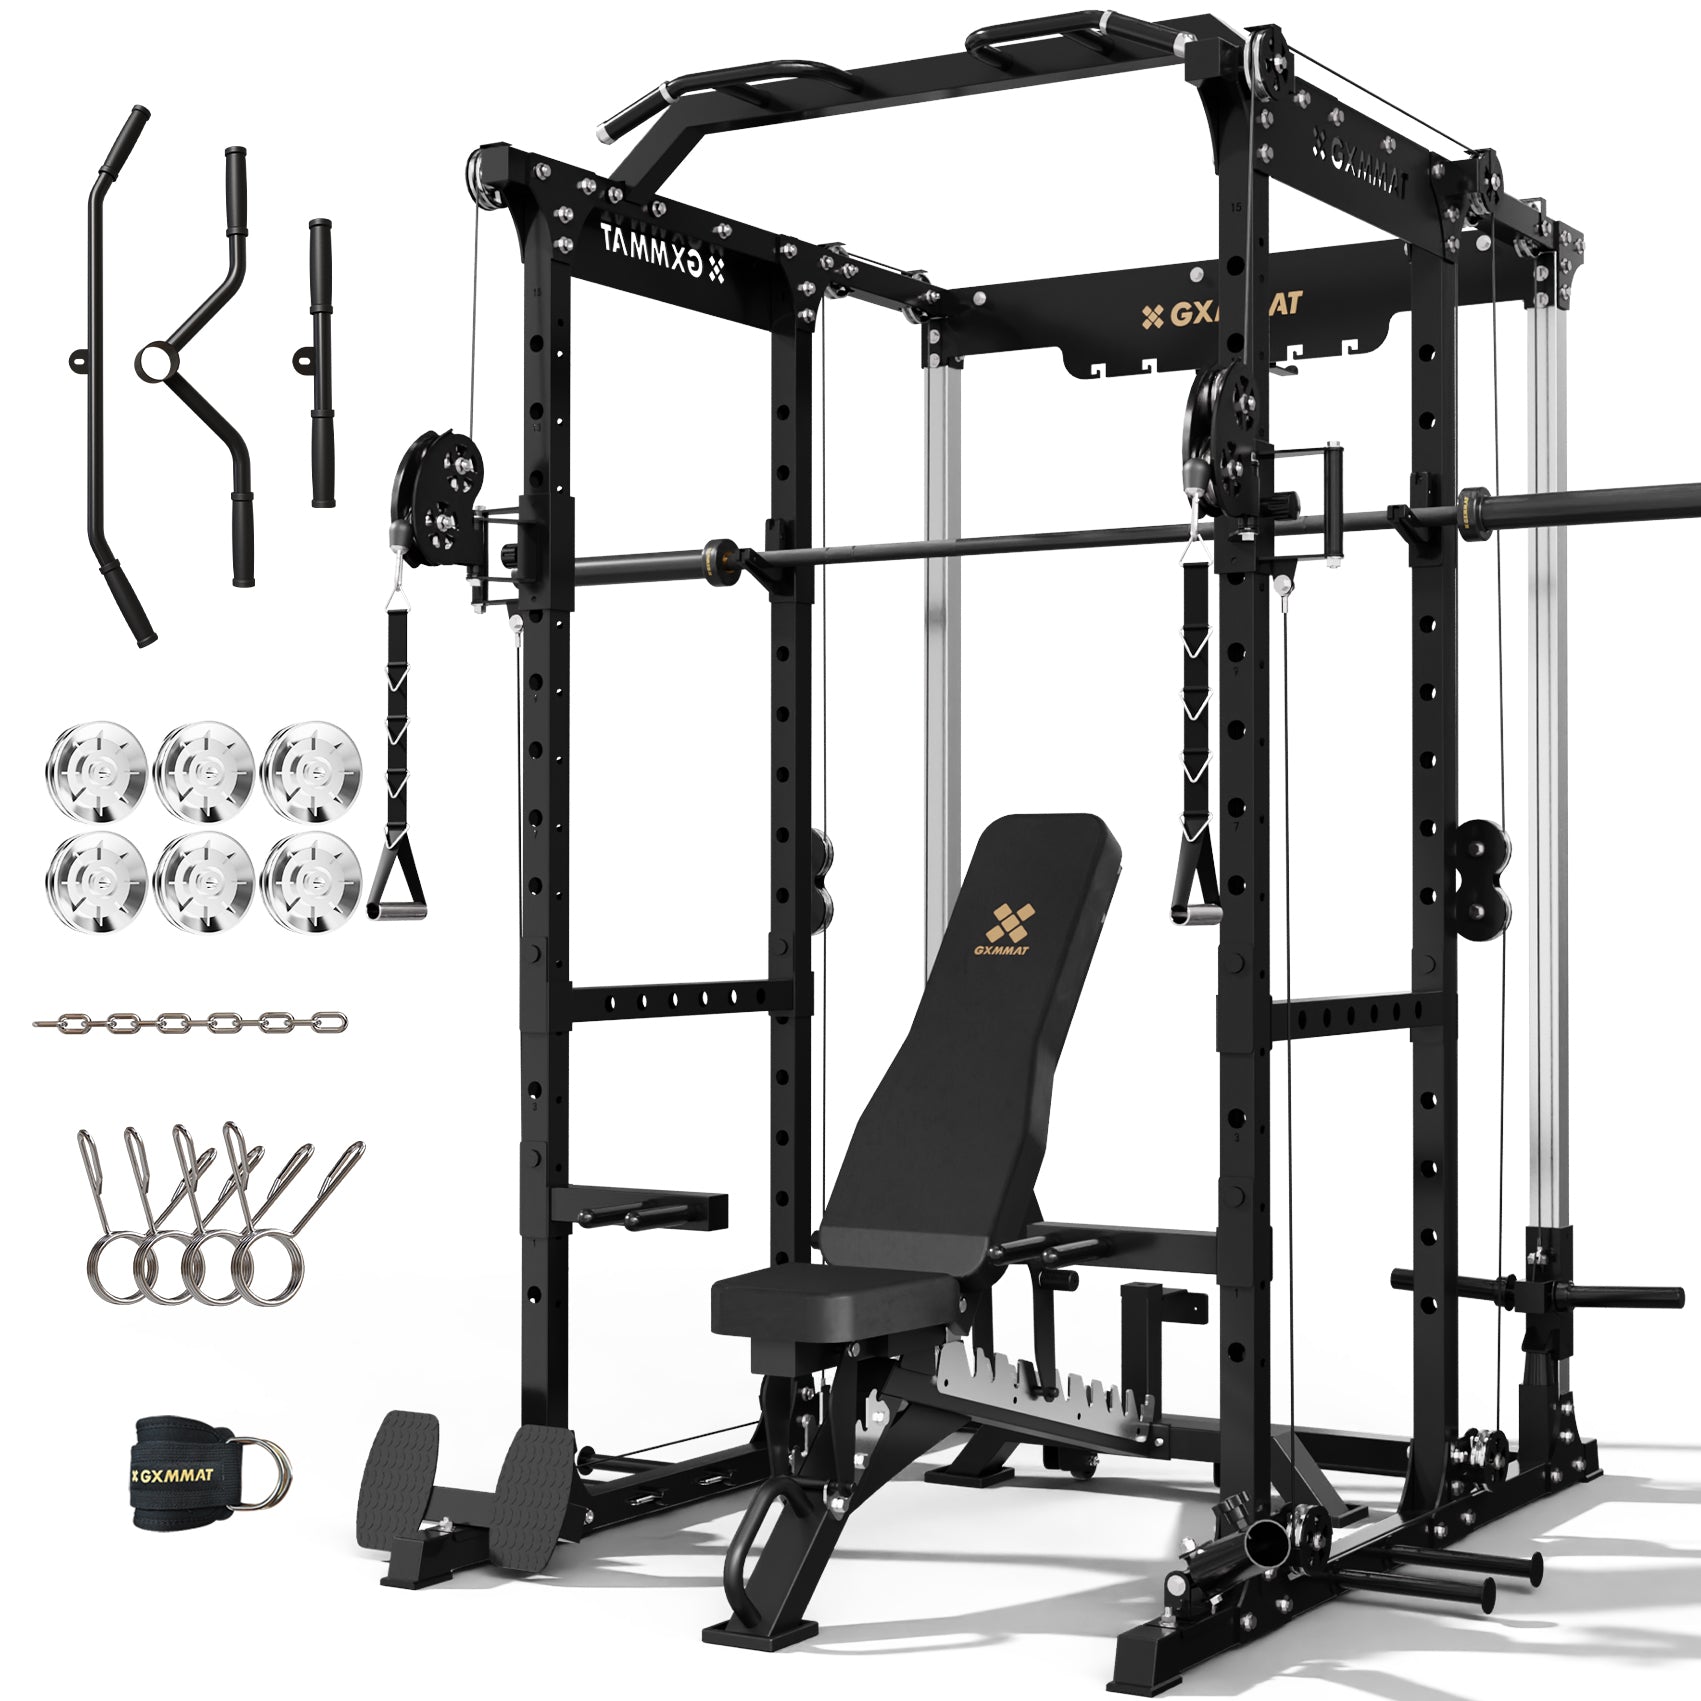
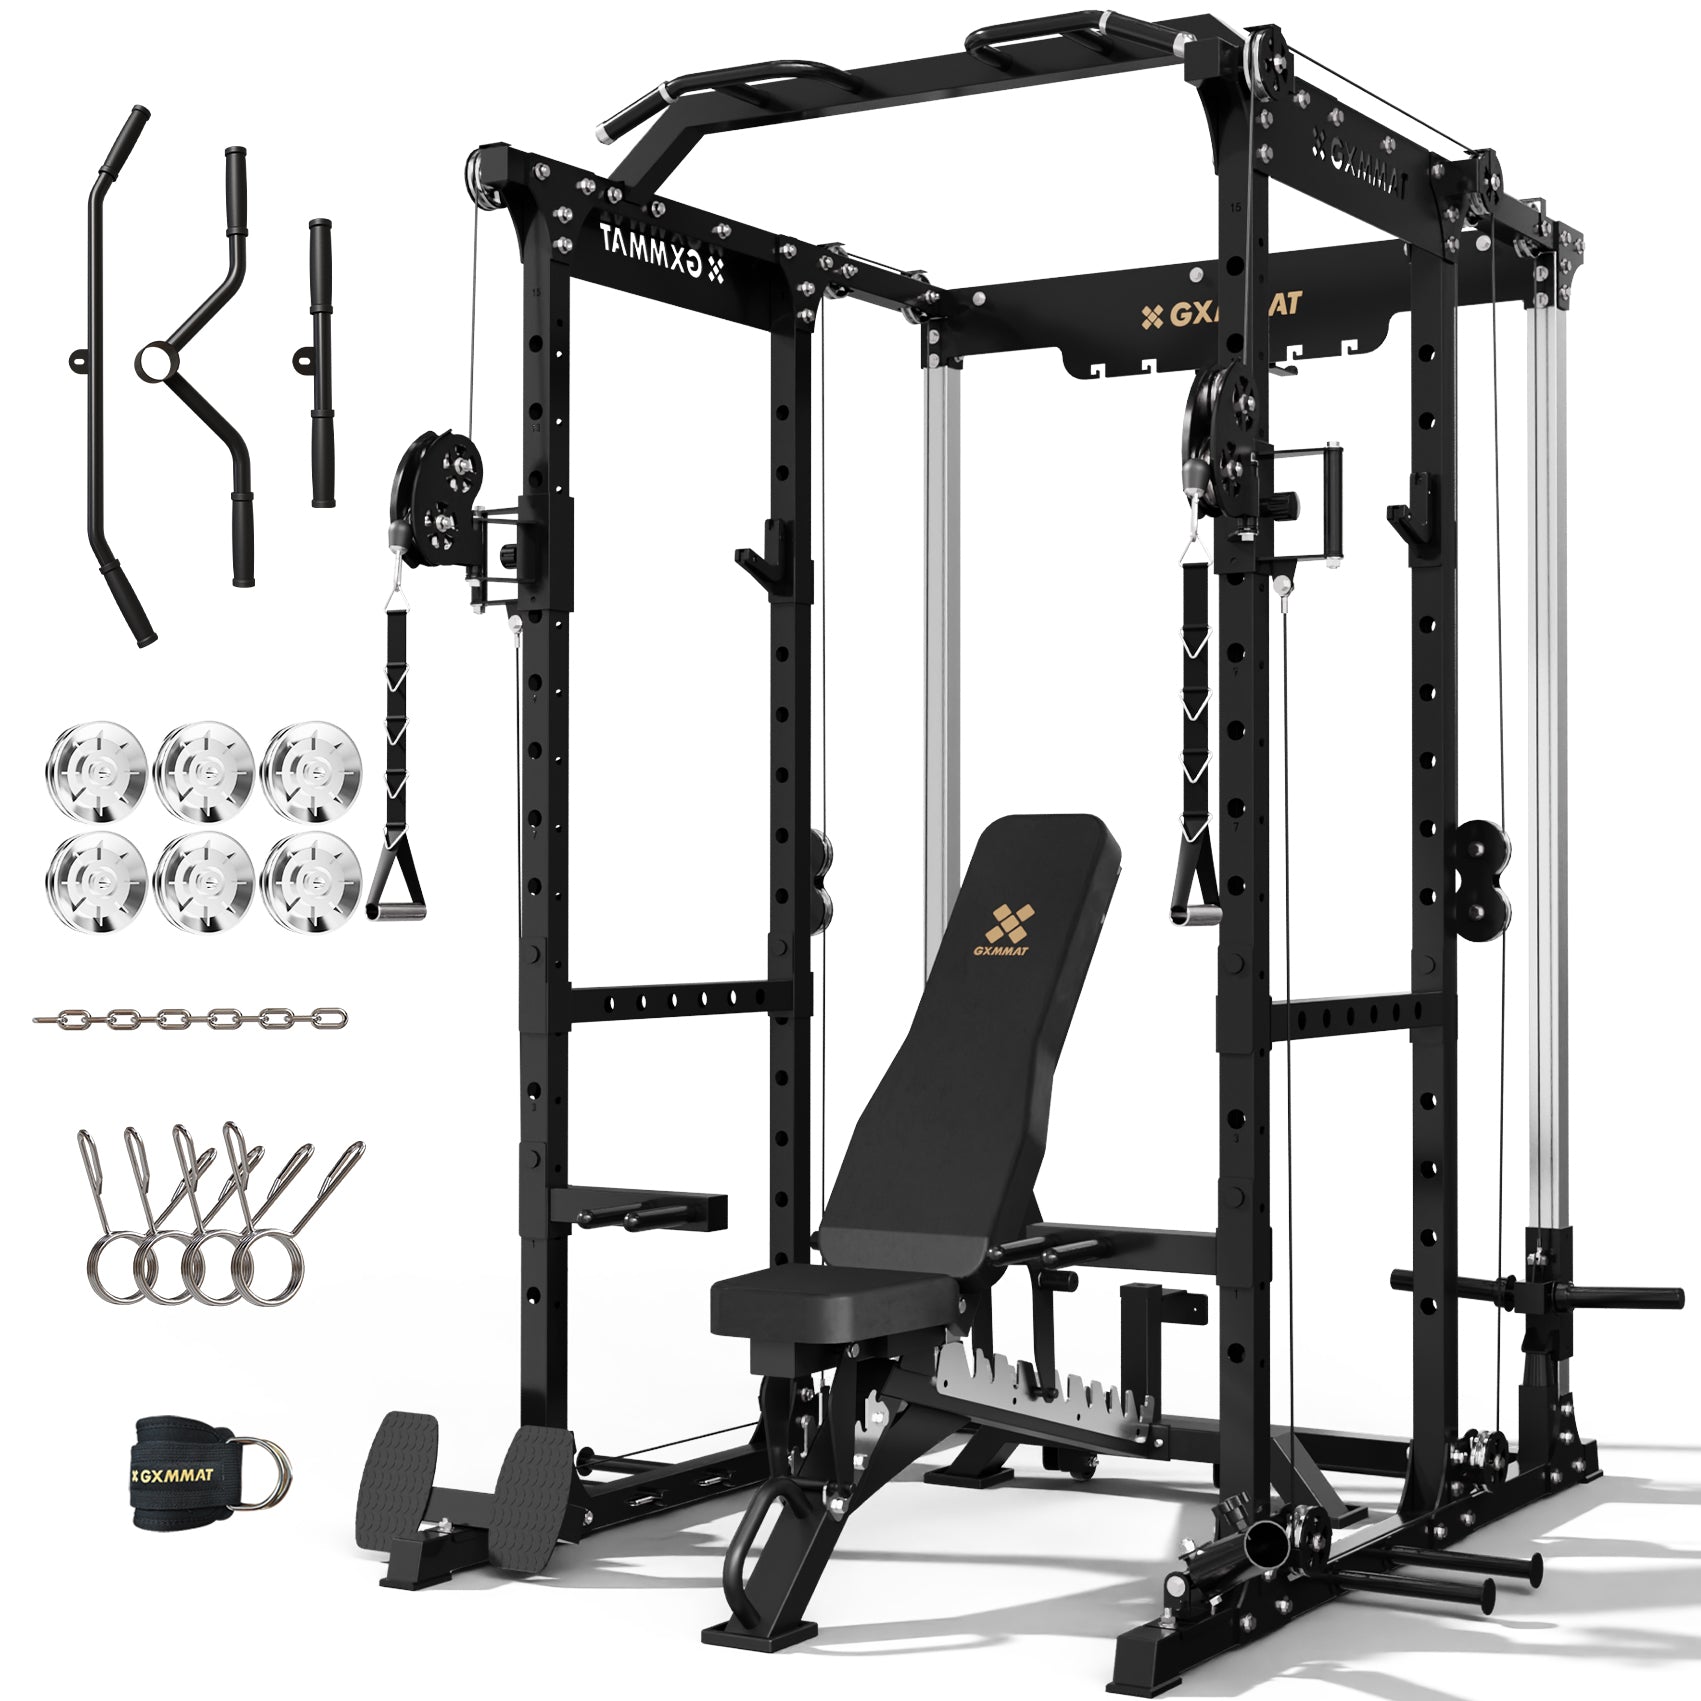
Multi-Function and All-in-One Racks
These integrate cables, sometimes a Smith machine, landmine, and storage into one unit. Think Major Fitness PLM03 or Force USA G3/MyRack with cable attachments.
Pros:
-
Replace multiple machines in one footprint
-
Cable systems enable lat pulldowns, rows, and crossovers
-
Good versatility for family use and general fitness
-
Often include dip bars and pull up bars
Cons:
-
More complex assembly
-
Thinner steel (often 2”x3” or smaller) than dedicated power cages
-
Unique dimensions limit cross-brand attachments
-
Cable systems may have lower weight capacity than dedicated units
Short/Low-Profile Racks
For basements with low ceilings (under 8 feet), short racks around 79-84” tall are essential. Models like the Body-Solid GPR400 or compact racks from various brands fit this niche.
These let you train without banging pull up bars into the ceiling, though you may still need to do overhead presses seated.
Core Specifications That Actually Matter (And What Numbers to Aim For)
Rack specifications can seem overwhelming. Here’s what actually matters and what numbers to aim for.
Steel Gauge
Steel gauge measures thickness. Lower numbers mean thicker steel.
|
Gauge |
Thickness |
Best For |
|---|---|---|
|
11-gauge |
~3mm |
Serious lifting, commercial use, heavy loads |
|
12-gauge |
~2.7mm |
Most home lifters, good balance of cost and strength |
|
13-14 gauge |
~2-2.3mm |
Budget racks, lighter use, beginners |
For anything involving squats over 300 lb or dynamic movements like kipping pull ups, 11-gauge steel provides noticeably better rigidity.
Upright Size and Hole System
The most common configurations:
-
3”x3” uprights with 5/8” or 1” holes: The current standard for premium racks (Rogue Monster Lite/Monster, REP PR-4000/5000, Bells of Steel Hydra)
-
2”x3” uprights: Common in mid-range and budget racks, still capable but fewer attachment options
-
2”x2” uprights: Entry-level racks, adequate for beginners but limited upgrade path
If cross-brand attachment compatibility matters to you, 3”x3” with 5/8” holes opens the most doors.
Hole Spacing
Westside spacing means 1” spacing in the bench press zone (roughly 14-40” from the floor) and 2” spacing elsewhere. This allows fine-tuning safety bar and J hook positions for precise bench press setup.
Uniform 2” spacing works fine for most lifters but offers less precision for bench pressing.
Weight Capacity
Advertised capacity numbers require context:
-
500-700 lb: Adequate for casual lifters and beginners
-
1,000 lb: Standard for serious home gyms
-
1,500+ lb: Competition-grade, mostly marketing for home use
Remember that capacity includes the weight of plates stored on the rack, not just what’s on the bar.
Footprint and Height
Depth options:
-
24” interior: Compact, works for most exercises
-
30” interior: More room for bench positioning and movement
-
41” interior: Maximum space, excellent for tall lifters
Height considerations:
-
79-84”: For low ceilings (under 8 feet)
-
90”: Standard garage height
-
100-108”: For high ceilings and comfortable pull ups
A 90” rack in an 8-foot ceiling leaves about 6” of headroom—tight for pull ups unless you bend your knees.
Hardware Quality and Finish
Look for grade 5 or better bolts, numbered holes for quick adjustment, and quality powder coating. Cheap finishes chip quickly from J hooks and safety bars scraping against uprights during adjustments.

Best-Use Cases: Matching Rack Style to Your Training and Space
The “best” home gym power rack depends entirely on how you train, who else uses the equipment, and what constraints your space imposes.
Heavy Barbell and Powerlifting Focus
If you’re regularly squatting 400+ lb and bench pressing 300+ lb, you need:
-
4-post 11-gauge steel rack rated 1,000+ lb
-
Flip-down or strap safeties (faster adjustment, quieter than pin-and-pipe)
-
Westside hole spacing for bench precision
-
Ability to bolt to concrete floor
-
Band pegs for accommodating resistance work
Consider racks like the REP PR-5000 or Rogue RML-490.
Small Garages and Multipurpose Spaces
When the rack shares space with cars, lawn equipment, or family activities:
-
Flat-foot designs that don’t require drilling
-
Consider wall-mounted or folding racks if you need to reclaim floor space
-
Integrated plate storage keeps weights organized without separate trees
The Titan X-3 flat foot and Bells of Steel residential racks work well here.
All-in-One Functional Training
For families or general fitness enthusiasts who want versatility without buying separate equipment:
-
Racks with integrated cable columns
-
Multi-grip pull up bars for variety
-
Built-in dip stations
-
Landmine attachments for athletic movements
The Force USA MyRack system and Major Fitness PLM03 fit this profile.
Low-Ceiling Basements
Basements under 7.5 feet present real challenges:
-
Choose short racks around 79-84” tall
-
Plan to do overhead presses seated or outside the rack
-
Some folding wall racks have lower profiles
-
Multi-grip pull up bars that mount lower can help
Apartment and Rental Situations
When you can’t drill into floors or walls:
-
Prioritize freestanding flat-foot designs
-
Choose compact footprints that disassemble for moving
-
Plate storage on the rack adds stability without bolting
-
Consider squat stands if space is extremely limited
Attachments and Modularity: Building a Rack That Grows With You
Modern home gym power racks from the 2018-2026 era function as modular ecosystems. Smart buyers start with a solid base and add attachments over time rather than buying everything upfront.
Must-Have Attachments for Most Lifters
J-hooks or J-cups: Your barbell rests on these before and after every lift. Quality sandwich J-cups with UHMW plastic lining protect bar knurling and reduce noise.
Safeties: Three main types:
-
Pin-and-pipe: Strongest, simplest, slowest to adjust
-
Flip-down: Fast adjustment, heavy-duty, flat surface
-
Safety straps: Quietest, protects bar, allows slight sag to keep failed lifts low
Pull up bar: Straight bars work fine. Multi-grip bars with neutral and angled handles offer variety and are easier on shoulders.
Popular Cable Attachments
A cable crossover or lat pulldown system transforms your rack into a near-complete gym:
-
Lat pulldown for back training
-
Low row for cable rows and face pulls
-
Full cable crossover for chest flies, triceps work, and more
Modern systems often use 2:1 pulley ratios for smoother motion. Around 90 kg (200 lb) per side handles most home training needs.
Specialty Add-Ons Worth Considering
|
Attachment |
What It Does |
|---|---|
|
Dip handles |
Chest and triceps training |
|
Landmine |
Rotational presses, rows, athletic movements |
|
Monolift hooks |
Hands-free unracking for heavy squats |
|
Belt squat lever |
Leg training without spinal loading |
|
Plate storage pegs |
Organize weights on the rack itself |
Compatibility Issues to Watch
Unique upright sizes (like 3”x2” or true metric 75mm that doesn’t match imperial standards) and non-standard hole spacing limit your ability to buy attachments from other brands.
Before buying a budget rack, check whether it uses common standards. Saving $200 on the rack can cost you $500+ in incompatible attachments later.
Phased Upgrade Approach
A sensible progression for most home gym owners:
-
Start: Base rack with included J-hooks and basic safeties
-
Month 3-6: Upgrade pull up bar if needed, add dip bars
-
Year 1: Cable pulley system or lat pulldown
-
Year 2+: Specialty items like landmine, belt squat, monolift
This spreads cost over time and lets you learn what you actually use.
Example Racks by Category (With Real-World Models to Consider)
These examples illustrate earlier points with specific models. Use them as templates for comparing features rather than an exhaustive review.
Best Overall 4-Post Home Gym Rack
REP PR-4000 or Bells of Steel Hydra 4-Post
-
3”x3” 11-gauge uprights
-
1,000 lb capacity
-
Westside hole spacing
-
Massive attachment ecosystem
-
Lifetime or long-term structural warranty
-
Price range: $700-1,200 base configuration
These racks balance quality, modularity, and value. They accept attachments from multiple brands and will handle any weight most home lifters ever move.
Versatile All-in-One Rack
Major Fitness PLM03 or Force USA MyRack with Cables
-
3”x2” or 2”x3” uprights (varies by model)
-
Integrated cable arms with plate loading
-
Multi-grip pull up bar included
-
Dip handles included
-
Landmine often included
-
Price range: $800-2,000+ depending on configuration
Pros: Replaces lat machine, cable crossover, and dip station in one footprint. Good value for versatility seekers.
Cons: Thinner steel than dedicated power cages. Unique tubing sizes limit cross-brand attachments. Assembly is more complex.
Half Rack for Open Training
Rogue HR-2 or Titan T-3 Half Rack
-
Two front uprights with rear bracing
-
Spotter arms extend forward for safety
-
Plate storage on rear uprights
-
More open feel than full cages
-
Price range: $500-900
Best for lifters who prefer the open feel, want integrated storage, and don’t need full cage enclosure.
Budget Friendly Option Under $500
Titan T-3 Series or Bells of Steel Residential Rack
-
12-13 gauge steel
-
2”x3” uprights
-
600-700 lb rating
-
Shorter warranties (typically 1-2 years)
-
Lighter-duty safeties
These work well for beginners and intermediate lifters on a tight budget. Plan to upgrade if your strength training progresses significantly or you want heavy band work.
Small-Space Foldable Setup
PRx Profile PRO or Similar Folding Wall Rack
-
Folds to just a few inches from wall
-
Requires solid installation into studs or concrete
-
Full lifting functionality when deployed
-
Perfect for garage gyms where cars must park
-
Price range: $600-1,200
Installation is critical. Done poorly, these can be dangerous. Done right, they’re the best solution for space constraints.
Safety, Setup, and Daily Use in a Home Gym Environment
Even the best power cage is only as safe as its installation and your daily habits. A few minutes of proper setup prevents injuries that could sideline you for months.
When to Bolt Down Your Rack
Bolting to the floor is recommended when you’re:
-
Lifting very heavy loads (squats over 400 lb, heavy bench work)
-
Using aggressive resistance bands attached to the rack
-
Doing kipping pull ups or muscle-ups
-
Using a half rack where spotter arm leverage could cause tipping
When bolting isn’t needed:
-
Flat-foot designs with extended bases
-
Racks loaded with 300+ lb of plate storage
-
Conservative lifting within the cage with controlled movements
Basic Assembly Guidance
Most racks ship partially assembled. Follow this process:
-
Organize all hardware before starting
-
Loosely assemble the entire frame first
-
Square the rack using a carpenter’s square or diagonal measurements
-
Tighten all bolts to spec once square
-
Use a torque wrench for critical connections
-
Re-check tightness every 2-3 months
Setting Safety Bars Correctly
For squats: Set safeties just below your lowest squat depth. Test with an empty bar first—you should be able to dump the bar onto safeties without it hitting your back.
For bench: Set safeties high enough to catch the bar above your chest if you fail, but low enough they don’t interfere with full range of motion. Westside spacing makes this easier.
Always test safety bar height with an unloaded bar before attempting working sets. This 30-second check could prevent a serious injury.
Everyday Best Practices
-
Keep the lifting zone clear of loose plates, toys, and equipment
-
Store plates on pegs or trees, not scattered on the ground
-
Use collars on all working sets—plates sliding mid-lift is dangerous
-
Return J hooks and safeties to default positions after each session if multiple people train
Environmental Considerations
Garage gyms deal with moisture, temperature swings, and sometimes pests. Wipe down the rack and barbell after sweaty sessions. Consider a dehumidifier in humid climates to prevent rust.
Rubber flooring protects concrete, rack feet, and plates. It also reduces noise and provides better footing. Horse stall mats (3/4” thick) are a popular affordable option.
Costs, Warranties, and Long-Term Value of a Home Gym Power Rack
Understanding price tiers and what drives them helps you make a purchase that matches your goals and timeline.
Typical Price Tiers (2025-2026)
|
Tier |
Price Range |
What You Get |
|---|---|---|
|
Entry-level |
$250-500 |
12-14 gauge steel, 2”x2” or 2”x3” uprights, basic safeties, 1-year warranty |
|
Mid-tier |
$700-1,300 |
11-gauge steel, 3”x3” uprights, Westside spacing, expandable ecosystem, 3-10 year warranty |
|
Premium |
$1,500+ |
Heavy-gauge steel, made in USA, lifetime warranty, commercial-grade durability |
Why Paying More Upfront Often Saves Money
An 11-gauge 3”x3” rack with a strong attachment ecosystem costs more initially but offers:
If you're setting up a heavy-duty rack, it's also essential to choose the best thickness for an exercise mat to protect your flooring and equipment.
-
Longer service life (10-20+ years)
-
Better resale value if you ever sell
-
Compatibility with third-party attachments
-
No “upgrading twice” as you get stronger
Many lifters buy a budget rack, outgrow it in 2-3 years, then buy a quality rack anyway. The budget rack sits unused or sells for a fraction of its price.
Warranty Terms to Understand
-
1 year: Standard for budget options; covers manufacturing defects only
-
5-10 years: Common for mid-tier racks; usually structural components only
-
Lifetime structural: Premium brands; typically excludes powder coat and accessories
Always read what’s actually covered. “Lifetime warranty” on the frame doesn’t help if your J hooks fail and aren’t included.
Shipping Realities
Heavy racks ship via freight. Expect:
-
Curbside drop-off (driver leaves it at the curb, not in your garage)
-
Pallets or heavy boxes requiring help to move
-
Potential for shipping damage—inspect everything before signing
Report missing hardware or damage immediately. Most companies will replace parts, but only if you document issues at delivery.
Budgeting Framework
For a complete home gym, consider allocating:
-
25-40%: Power rack with essential attachments
-
15-20%: Quality barbell
-
25-30%: Plates
-
10-15%: Bench
-
10-15%: Flooring and accessories
A $2,500 total budget might allocate $800 to the rack, $400 to a barbell, $700 to plates, $350 to a bench, and $250 to flooring and gear.
The Long-Term Perspective
A quality power rack serves you for 10-20 years. Calculate the value:
-
Gym membership at $50/month = $600/year = $6,000 over 10 years
-
A $1,000 rack that lasts 15 years costs $67/year
Even an affordable price point rack pays for itself quickly when you factor in gas, time, and the convenience of training whenever you want.
FAQ: Home Gym Power Rack Questions You Might Still Have
Is a power rack better than a Smith machine for a home gym?
For most home gym owners, yes. A power rack allows natural barbell movement, trains stabilizer muscles, and accepts many attachments for expanded training options. Smith machines have their place for guided movements and certain rehabilitation exercises, but they’re rarely as versatile as the primary centerpiece of a home gym. If you want a Smith machine, consider an all-in-one rack that includes both.
Can I safely use a budget 13-14 gauge rack if I’m a beginner?
Many beginners can lift safely on lighter-gauge racks as long as total load stays under 500-600 lb. However, be aware of increased flex in the frame during exercises, avoid aggressive band work that adds lateral stress, and plan to upgrade if your strength training progresses beyond the rack’s comfortable limits. A budget rack that gets you training today beats waiting months for a “perfect” setup.
How much ceiling height do I actually need for a power rack with pull ups?
Most 90” racks require roughly 8-foot ceilings for comfortable pull ups without hitting your head. Basements below 8 feet often need short racks in the 79-84” range or creative solutions like low-mounted multi-grip bars. Overhead press is even more space-hungry—many lifters with low ceilings do these seated or outside the rack entirely.
Do I need a special barbell or plates for my power rack?
Any standard 7-foot Olympic barbell (28-29mm shaft diameter, 50mm sleeves) works with all standard racks. Avoid short “exercise bars” or non-Olympic bars—they may not rack correctly or could slip from J hooks. For plates, both iron and bumper plates work fine. Just check that bumper plate diameter doesn’t interfere with safeties at your lowest setting.
Can one rack work for multiple people in the same household?
Absolutely. Adjustable J hooks and safeties with close hole spacing make it easy to accommodate lifters of different heights and lift preferences. Consider keeping a training log or marking default pin settings (with colored tape or labels on numbered holes) so family members can quickly adjust between workouts. A rack with Westside spacing offers the most flexibility for different-sized lifters sharing bench press setups.