Building Your Dream Home Gym: What I Learned From Setting Up My Rogue Power Rack
When I finally decided to invest in a proper home gym setup, I knew I wanted something that would last. After months of research and speaking with trainers I trust, I settled on a Rogue power rack. What I didn't fully appreciate at the time was just how much the assembly process would teach me about the equipment I'd be using every single day. If you're considering the Rogue RML-490, RML-490C, or RML-690 power rack for your home gym, let me share what I've learned through hands-on experience.
Why Assembly Matters More Than You Think
Before we dive into the specifics, I want to address something that often gets overlooked: putting together your own power rack isn't just about saving money on installation. It's about understanding your equipment intimately. When you've tightened every bolt and aligned every hole yourself, you develop a relationship with your rack. You know exactly how it's constructed, which makes you more confident when you're loading heavy weights onto it.
I remember the day my Rogue delivery arrived. The boxes were substantial, and I'll be honest—I felt a moment of panic wondering what I'd gotten myself into. But taking the time to properly assemble my rack turned out to be one of the most satisfying parts of creating my home gym.
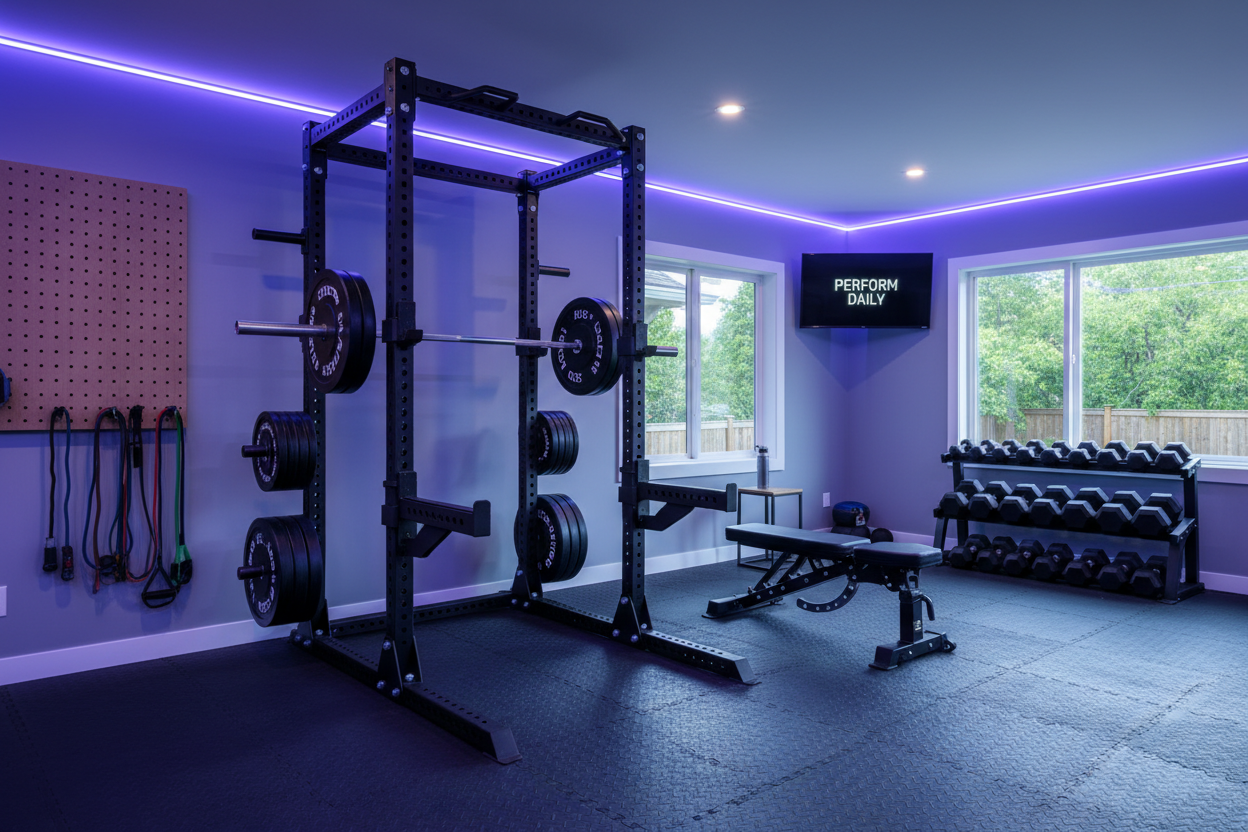
Understanding the Rogue RML Series
The RML series represents Rogue's Monster Lite line, which strikes a brilliant balance between heavy-duty construction and space efficiency. Whether you're looking at the RML-490, RML-490C, or RML-690 power rack, you're getting 3x3-inch steel uprights with Westside hole spacing. This design gives you incredible versatility for different exercises while maintaining a footprint that works in most home gyms.
The main differences between models come down to depth and configuration. The RML-490 offers a 90-inch height with a standard depth, while the RML-690 provides the same quality construction with different dimensional options. The RML-490C includes a crossmember feature that adds extra stability and attachment options. Each model serves different space requirements and training preferences, but the assembly principles remain remarkably similar.
Preparing for Assembly Day
Here's what I wish someone had told me before I started: clear more space than you think you need. I initially set aside what I thought was plenty of room, only to realize I needed to spread out all the hardware, lay out the uprights, and have space to maneuver around the partially assembled rack. Give yourself at least a 10x10 foot area to work comfortably.
The tools you'll need are straightforward. A quality socket set is essential, and I found that having both a ratchet and a power drill with socket attachments made the job significantly easier. You'll be driving a lot of bolts, and while doing it all by hand is possible, it's unnecessarily exhausting. Don't skip the step of organizing your hardware before you begin. I sorted all the bolts, washers, and nuts into small containers, which saved me countless minutes of searching later.
The Assembly Process: What to Expect
Following the rogue rml 490 assembly instructions, rogue rml-690 assembly instructions, or rogue rml-490c assembly instructions requires patience and attention to detail. The process typically takes between two to four hours, depending on your mechanical aptitude and whether you have a helper. I strongly recommend having a second person available, not because it's impossible alone, but because an extra set of hands makes certain steps much safer and easier.
Start by identifying all your pieces. The uprights should be clearly marked, and you'll want to ensure you understand which is front, back, left, and right before you begin. The instruction manuals are generally clear, but they assume you're taking your time to read each step completely before acting. I made the mistake of skimming ahead once and had to backtrack to correct a bolt I'd fully tightened when it should have been left loose for alignment purposes.
One of the most critical aspects of assembling any Rogue RML-690 power rack or its siblings is not fully tightening bolts until you've confirmed everything is properly aligned. This is especially true for the main upright connections. Get all the bolts started, check that everything is square and level, then systematically tighten everything down. This approach prevents binding and ensures your rack stands perfectly vertical.
Common Challenges and How to Overcome Them
The weight of the components can catch you off guard. Each upright is solid steel and requires careful handling. I learned to use furniture sliders under the base of uprights when positioning them, which saved my floors and my back. When you're aligning holes for bolts, sometimes they don't line up perfectly at first. Rather than forcing anything, slightly loosening nearby bolts usually provides enough play to get everything aligned.
Thread engagement is another area where patience pays off. Cross-threading a bolt in powder-coated steel is frustrating and potentially damaging. I got into the habit of starting every bolt by hand, turning it backwards until I felt the slight click of the threads engaging, then turning it forward. This simple technique prevented every cross-threading issue I might have encountered.
The Finishing Touches
Once your rack is assembled, take time to double-check every connection. I went through with my socket wrench and verified each bolt was properly tightened. Then I tested the rack's stability by applying pressure from different angles. A properly assembled power rack shouldn't wobble or shift at all. If you detect any movement, identify which connection needs additional tightening.
Before loading any weight onto your new rack, perform a thorough inspection of the J-cups and safety bars. These components are what stand between you and a potentially dangerous situation during heavy lifts. Ensure they're correctly installed according to the specifications in your rogue rml 690 assembly instructions or whichever model you've chosen.
Living With Your Rack
After several months of regular use, I can tell you that the time invested in proper assembly was absolutely worth it. My rack has handled everything I've thrown at it—heavy squats, bench press sessions, pull-ups with added weight, and countless other exercises. Knowing that I built it myself gives me complete confidence in its integrity.
Maintenance is minimal but important. Every few months, I check the main bolts to ensure nothing has loosened with use. I also wipe down the uprights to prevent any moisture buildup, though the powder coating does an excellent job of protection. The Westside hole spacing has proven incredibly useful for making small adjustments to bar height, something I use constantly as I vary my training.
Final Thoughts on Your Investment
Setting up a home gym with a quality power rack is one of the best fitness decisions you can make. The convenience of training on your own schedule, in your own space, with equipment you trust, is genuinely life-changing. Whether you choose the RML-490, RML-490C, or RML-690, you're getting a piece of equipment that will serve you for decades if properly assembled and maintained.
The assembly process might seem daunting when you first open those boxes, but approach it methodically, give yourself adequate time, and don't hesitate to ask for help when needed. The sense of accomplishment when you complete your first workout on a rack you built yourself is something special. It's not just about the physical exercise—it's about taking ownership of your fitness journey in the most tangible way possible.
Remember, this isn't a race. Take your time with the assembly, follow the instructions carefully, and build something you can be proud of. Your future self, crushing personal records in your home gym, will thank you for the care you took today.
