Stop Tripping Over Your Weights: A Solid DIY Kettlebell Rack Guide for Your Home Gym
Nothing kills the momentum of a workout quite like having to navigate a minefield of cast iron scattered across your floor. If you have been training for any length of time, you know that kettlebells have a habit of multiplying. You start with a single 16kg bell, and before you know it, you have pairs of 24s, a heavy 32kg for swings, and a few lighter ones for warm-ups. Keeping them organized isn't just about aesthetics; it is a safety necessity. The most effective solution is usually a custom build. A sturdy diy kettlebell rack allows you to maximize your floor space while keeping your equipment accessible and your toes unbruised.
Building your own storage solves the specific geometry problem that kettlebells present. Unlike dumbbells, which are uniform, kettlebells are bottom-heavy and round. They need a flat, deep surface with a secure lip to prevent rolling. While you can buy metal racks, they are often overpriced and might not fit the specific nook you have available in your garage or basement. By using construction lumber and heavy-duty screws, you can construct a unit that handles hundreds of pounds of iron for a fraction of the cost of a commercial unit.
Why I Finally Built My Own Storage
My breaking point came about three years into my home training journey. I was doing a complex of swings and goblet squats in a cramped single-car garage. I set a bell down, turned to grab a sip of water, and nearly broke my ankle tripping over a 20kg bell I had left near the door. It wasn't just dangerous; it was annoying. The floor was getting scratched up, and the clutter made the room feel half the size it actually was.
I looked at commercial options, but most were designed for massive commercial gyms or were flimsy metal shelves that looked like they would buckle under my collection. I decided to head to the hardware store instead. Building a wood kettlebell rack gave me the freedom to measure my exact wall space and customize the shelf height so I wasn't bending over with a rounded back to pick up a heavy weight. The satisfaction of racking a heavy bell onto a structure you built yourself adds a surprisingly nice touch to the workout.
Planning Your Build: Materials and Safety
Before you fire up the saw, you need to respect the weight you are dealing with. A collection of six to eight kettlebells can easily exceed 300 pounds. This is not the place for particle board or thin MDF. You need structural lumber. For the frame, standard 2x4s or 2x6s are the gold standard. For the shelves, you want at least 3/4-inch plywood, or even better, 2x10 or 2x12 dimensional lumber.
When brainstorming kettlebell storage ideas, prioritize shear strength. This refers to the fastener's ability to resist being cut in half by the downward force of the weight. Do not use drywall screws. They are brittle and will snap under the load. Use structural lag screws or heavy-duty construction screws (like GRK or Spax) that are rated for load-bearing applications. If you are anchoring the rack to the wall—which you absolutely should to prevent tipping—make sure you are drilling into studs, not just drywall anchors.
The Anatomy of a Good Rack
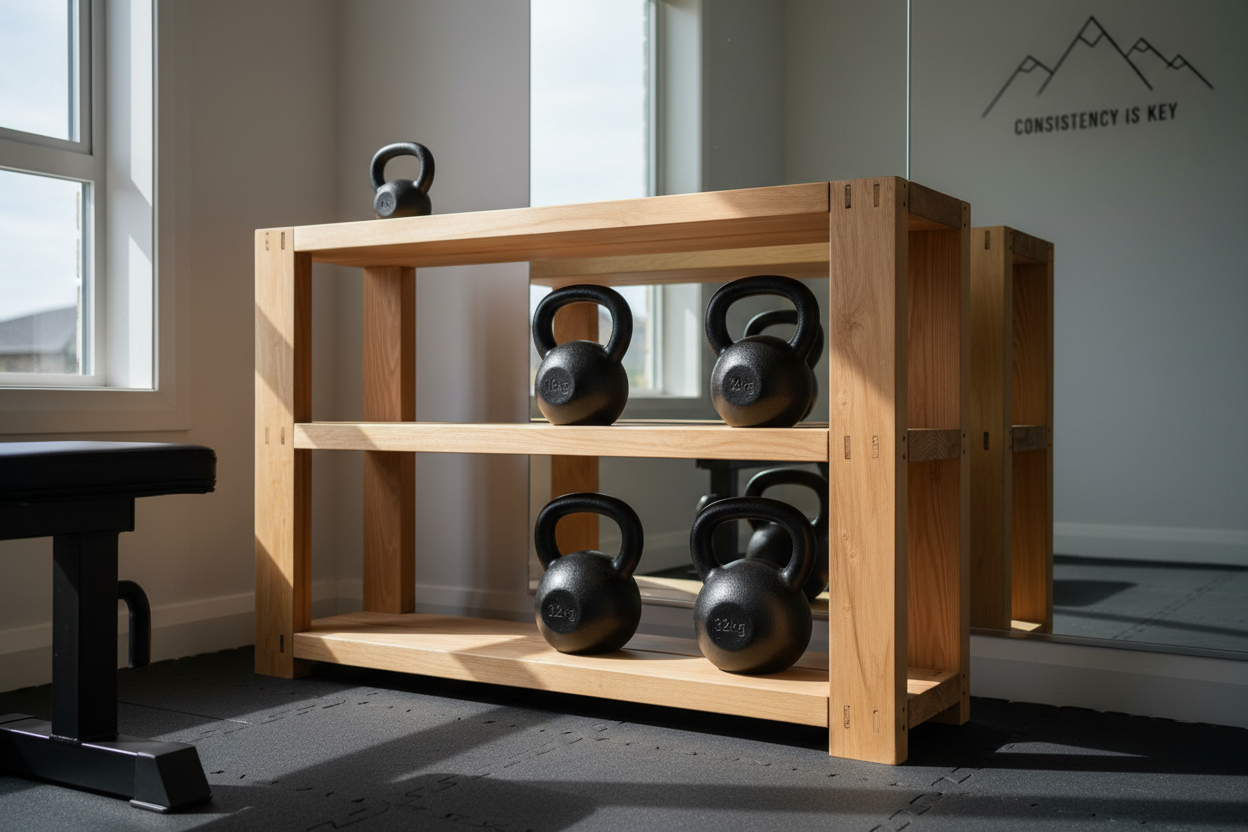
A functional kettlebell storage rack diy project usually consists of two or three tiers. The bottom tier should house your heaviest bells (24kg and up). This keeps the center of gravity low and makes it easier to lift them safely. The middle or top tiers can hold your lighter bells, chalk bucket, or bands.
The shelf depth is critical. Measure the diameter of your largest bell and add two inches. Usually, a depth of 10 to 12 inches works well for most standard cast iron bells. If you are using competition bells, which are all the same size regardless of weight, you can stick to a uniform depth. The most overlooked feature in DIY builds is the retaining lip. You need a strip of wood (a 1x2 works perfectly) screwed into the front edge of the shelf. This creates a barrier so that if you bump the rack, a 50-pound cannonball doesn't roll off and crush your foot.
Step-by-Step Construction Tips
Start by building two identical ladder-frame sides using your 2x4s. These will act as the legs. Determine the height of your shelves based on your own height. A good rule of thumb is to have the top shelf just below chest height and the bottom shelf at shin height. Spacing them too close together makes it awkward to rack the weights without pinching your fingers.
Once your sides are built, connect them with your shelving material. If you are using 2x10 lumber for the shelves, you might want to run a support beam underneath the center if the span is wider than 36 inches. Wood can sag over time under constant load. Keeping the span relatively short ensures the rack stays straight. After the shelves are secured, attach your front lip and a back stop if the rack isn't flush against a wall.
Sand everything down thoroughly. You will be grabbing weights off this rack with sweaty hands, and picking up a splinter mid-workout is a disaster. A few coats of polyurethane or a sturdy deck stain will protect the wood from sweat and moisture, which is especially important if your gym is in a garage that sees temperature fluctuations.
Alternative Storage Solutions
Perhaps you don't have the tools or space for a full carpentry project. There are other creative diy kettlebell storage methods that require less construction. One popular industrial look involves using galvanized plumbing pipes and thick wood planks. The pipes provide incredible strength and give the gym a rugged, dungeon-style aesthetic. However, pipe fittings can be surprisingly expensive, often costing more than lumber.
For those with very limited space, floor storage is acceptable if done right. Instead of scattering them, build a simple low-profile platform or "tray" that sits on the floor. This frames the designated area, keeping the bells contained. You can line the bottom of the tray with horse stall mats or heavy rubber flooring to protect the bells and dampen the noise when you put them away.
Final Thoughts on Gym Organization
Investing a Saturday afternoon into building proper storage pays dividends for years. It protects your floors, keeps your equipment in better condition, and removes the mental friction of starting a workout in a messy room. Whether you go for a multi-tiered wooden masterpiece or a simple low-profile tray, the key is stability and safety. Treat the build with the same seriousness you treat your training, and you will have a piece of furniture that lasts as long as your iron.
Frequently Asked Questions
What is the best type of wood for holding heavy kettlebells?
For the shelves, 2x10 or 2x12 dimensional lumber (pine or fir) is generally superior to plywood because it is less likely to bow under heavy static loads over time. If you use plywood, ensure it is at least 3/4-inch thick, high-grade, and properly supported with cross-bracing every 12 to 16 inches.
How do I prevent the kettlebells from damaging the wood rack?
You can staple strips of rubber flooring or cut-up yoga mats onto the shelf surface. This provides a grippy cushion that prevents the cast iron from gouging the wood and reduces the clanking noise when you rack your weights.
Can I use a standard bookshelf for kettlebell storage?
Generally, no. Standard bookshelves, especially those made of particle board (like IKEA furniture), are not rated for the concentrated weight of kettlebells. A single heavy bell can exceed the weight limit of an entire particle board shelf, leading to catastrophic failure.

