The Iron Sanctuary: Why the Rack is the Heart of Your Home Gym
There is a specific moment in every lifter's journey where the commercial gym loses its shine. Maybe it was the Tuesday evening you spent twenty minutes waiting for a squat rack while scrolling your phone, or perhaps it was the realization that your monthly dues were essentially renting you the right to listen to someone else's terrible playlist. Building a home gym solves these problems, but it introduces a new challenge: figuring out exactly what you need to train effectively without turning your parking space into a junkyard.
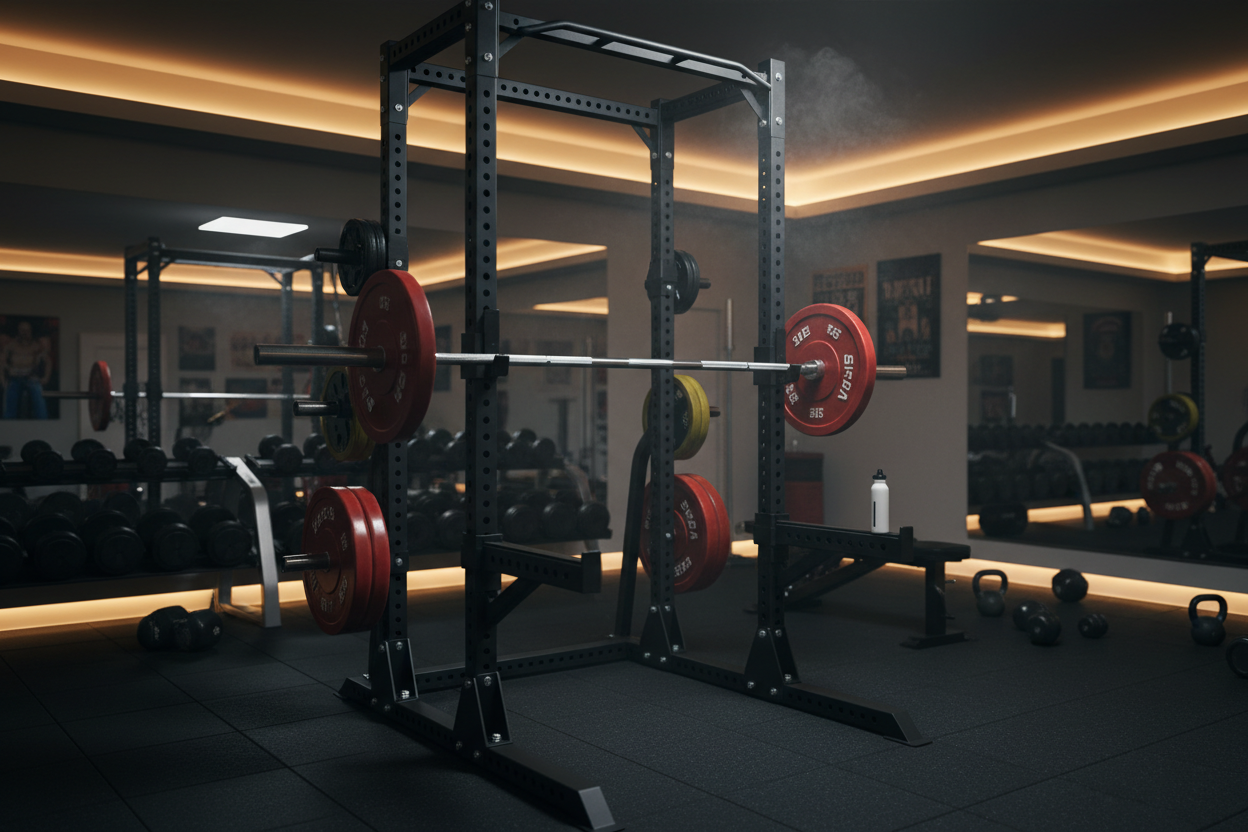
If you have limited budget or space, you might be tempted to start with just a barbell and some plates, or maybe a set of adjustable dumbbells. While those are useful tools, they limit your ability to perform heavy compound movements safely. The centerpiece of any serious training setup is the rack. It serves as your spotter, your storage, and the foundation for almost every movement that builds real strength. Choosing the right setup determines whether your garage remains a place to park the car or becomes a legitimate training facility.
Defining Your Space and Needs
Before buying a single bolt or upright, you have to look at your environment. Garages are notoriously tricky spaces. They often have sloped floors for drainage, overhead obstacles like garage door rails, and limited depth. A standard power cage might fit in the center of the room, but if it prevents you from opening the car door, you are going to resent it. I learned this the hard way years ago when I bought a full-sized cage that was two inches too tall for my ceiling joists. I spent an entire Saturday with a hacksaw modifying the uprights—a miserable experience I don't recommend.
When scouting for a gym rack for garage usage, height is usually the primary constraint. You need to account for the physical height of the posts, but also the clearance required for pull-ups. If your head is going to smash into the ceiling drywall every time you do a chin-up, the rack isn't functional. Measure the distance from the floor to the lowest obstruction, then subtract at least a foot if you plan on doing muscle-ups or overhead press inside the rack.
The Evolution of the Garage Gym Rack System
In the past, you had two choices: a flimsy squat stand that wobbled when you racked the bar, or a massive, welded commercial cage that cost more than the car you were displacing. The market has shifted dramatically. Modern equipment is modular. A high-quality garage gym rack system is no longer just four posts and a pull-up bar; it is an ecosystem.
We are seeing a surge in 3x3 inch steel uprights with varying hole sizes (usually 5/8 inch or 1 inch hardware). This standardization allows you to start with a basic squat stand and evolve it into a powerhouse over time. You might begin with just the uprights and J-cups. Six months later, you add spotter arms. The following year, you attach a dip station, a landmine attachment, or lever arms. This modularity means your initial investment isn't dead money; it's the foundation for future upgrades.
This versatility is crucial for home gym owners. In a commercial setting, you have a machine for lat pulldowns, a station for dips, and a bench for pressing. In a garage, your rack needs to facilitate all of those. By utilizing cable pulley attachments or jammer arms, the rack replaces four or five standalone machines, saving you precious square footage.
Safety When Training Alone
The most critical function of a rack is not holding the weight; it is catching the weight when you can't. Training at home usually means training alone. There is no one to grab the bar if you get stuck in the hole of a heavy squat or fail a bench press rep. This makes the safety features of your garage lifting rack non-negotiable.
I recall a specific session where I was testing my 1-rep max on the bench press. I got ambitious and added five more pounds than I should have. The bar stalled halfway up. Without a spotter, panic sets in quickly. Fortunately, I had set my safety straps correctly. I lowered the bar onto the straps, slid out from underneath, and lived to lift another day. Had I been using a cheap stand without safeties, that story would have ended with a trip to the emergency room.
When selecting your gear, look for robust safety options. Pin-and-pipe safeties are standard and strong, but they can be annoying to adjust and noisy. Safety straps are increasingly popular because they protect the knurling on your barbell and dampen the noise of a dropped weight—a feature your neighbors will appreciate. Flip-down safeties offer a middle ground, providing quick adjustments and high weight capacity.
Choosing the Right Configuration
The footprint of your equipment dictates the flow of your workouts. There are three main styles to consider, each with distinct advantages.
The Full Power Cage
This is the gold standard. You lift inside four (or six) uprights. It offers the highest safety because the bar is contained. If you have the space and plan on moving serious weight, this is the way to go. It usually requires bolting to the floor or a lifting platform for maximum stability, though flat-footed versions exist that are stable enough for most lifters.
The Half Rack
A half rack saves depth. You typically lift in front of the uprights rather than inside them. This feels more open and often includes plate storage on the back uprights. The trade-off is that you must rely on spotter arms extending from the front. If you stumble backward during a squat, you aren't contained by a rear crossmember.
The Folding Wall-Mount
For the true space-saver, the folding rack is an engineering marvel. These units mount to the wall and swing inward when not in use, protruding only a few inches from the studs. When you are ready to train, you swing them out and lock them in place with pins. They are surprisingly sturdy and perfect for garages that still need to park a vehicle at night. The installation is more involved, as you need to secure stringers to your wall studs, but the space reclaimed is worth the effort.
Installation and Anchoring
Regardless of the style you choose, stability is paramount. A garage lifting rack that shifts when you re-rack 300 pounds is terrifying. If you choose a full cage or a squat stand, consider weighing it down with plate storage pegs if you aren't going to bolt it to the concrete.
Bolting into concrete scares many homeowners, but it is a straightforward process with a hammer drill and some wedge anchors. It changes the feel of the rack entirely. It becomes a permanent structure, immovable and solid. If you are renting or can't drill, building a lifting platform out of plywood and horse stall mats is a fantastic alternative. You can bolt the rack to the wood, protecting the floor and providing a flat, stable surface that absorbs sound.
Building a gym is a process, not a single purchase. Start with a rack that fits your space and offers the safety features you need to train confidently alone. Treat it as a long-term investment in your health. The convenience of walking out your back door and being ready to squat in three minutes is a luxury that, once experienced, makes it impossible to go back to the commute, the crowds, and the waiting.
Frequently Asked Questions
Do I really need to bolt my rack to the floor?
While not always mandatory, it is highly recommended for safety. If you have a lightweight rack or perform dynamic movements like kipping pull-ups, the rack can tip. If you cannot drill into the concrete, look for "flat-foot" racks designed to be stable without anchoring, or bolt the unit to a plywood lifting platform.
What is the difference between 11-gauge and 14-gauge steel?
The gauge refers to the thickness of the steel, with lower numbers indicating thicker metal. 11-gauge steel is the standard for commercial and high-end home gym equipment, offering superior durability and weight capacity. 14-gauge is thinner and often found on budget racks; it may be sufficient for beginners but can feel less stable under heavy loads.
How much ceiling height do I need for a home gym rack?
Most standard racks are between 80 and 90 inches tall. You should aim for at least 6 to 12 inches of clearance above the rack if you plan to do pull-ups where your head goes over the bar. If you have low ceilings (under 8 feet), look for "short" or "retractable" rack models specifically designed for basements and tight garages.

