Stop Buying Cheap Gear: Why Your Power Rack Is the Only Investment That Matters
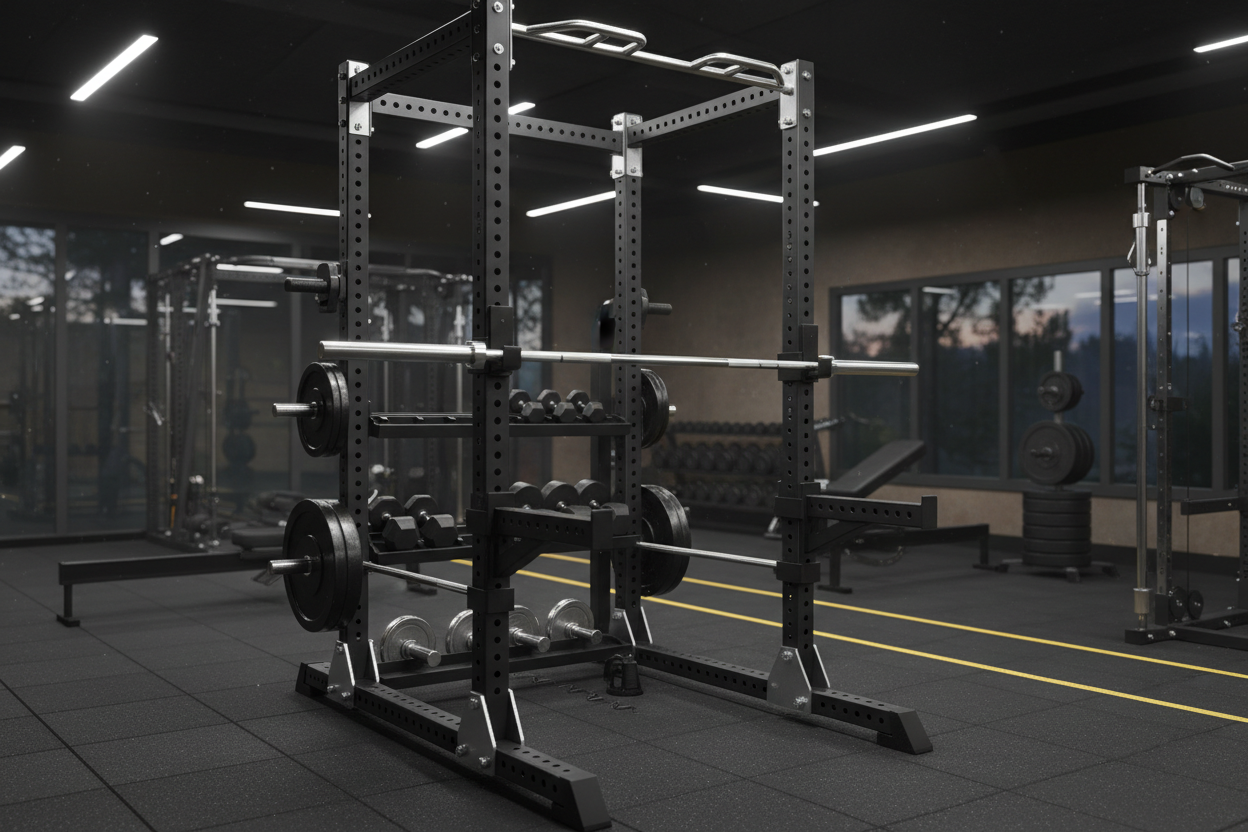
Most people start building a home setup backward. They buy a shiny barbell, a pile of bumper plates, and maybe a flat bench, thinking they have everything needed to get strong. Then leg day comes around. You load up the bar for a squat, walk it out, and suddenly realize you have zero safety net if your legs give out. This is usually the moment the panic sets in, and it is exactly why the centerpiece of any serious training space needs to be a high-quality cage or stand.
The foundation of heavy lifting isn't the weight itself; it's the structure that allows you to handle that weight safely. Whether you are training in a commercial facility or a garage, the equipment you choose dictates your training ceiling. If you are afraid to fail a rep because you don't have safety spotters, you will never push hard enough to trigger real adaptation. Finding the right rack for gym setups—whether professional or personal—is about buying insurance for your body so you can lift without hesitation.
The Real Job of a Power Rack
A rack serves two primary functions: safety and versatility. Too many beginners view it simply as a place to rest the barbell between sets. While holding the weight is part of the job, the real value lies in the safety pins, straps, or spotter arms. These components catch the barbell if you miss a lift, preventing a heavy load from crushing your chest during a bench press or pinning you to the floor during a squat.
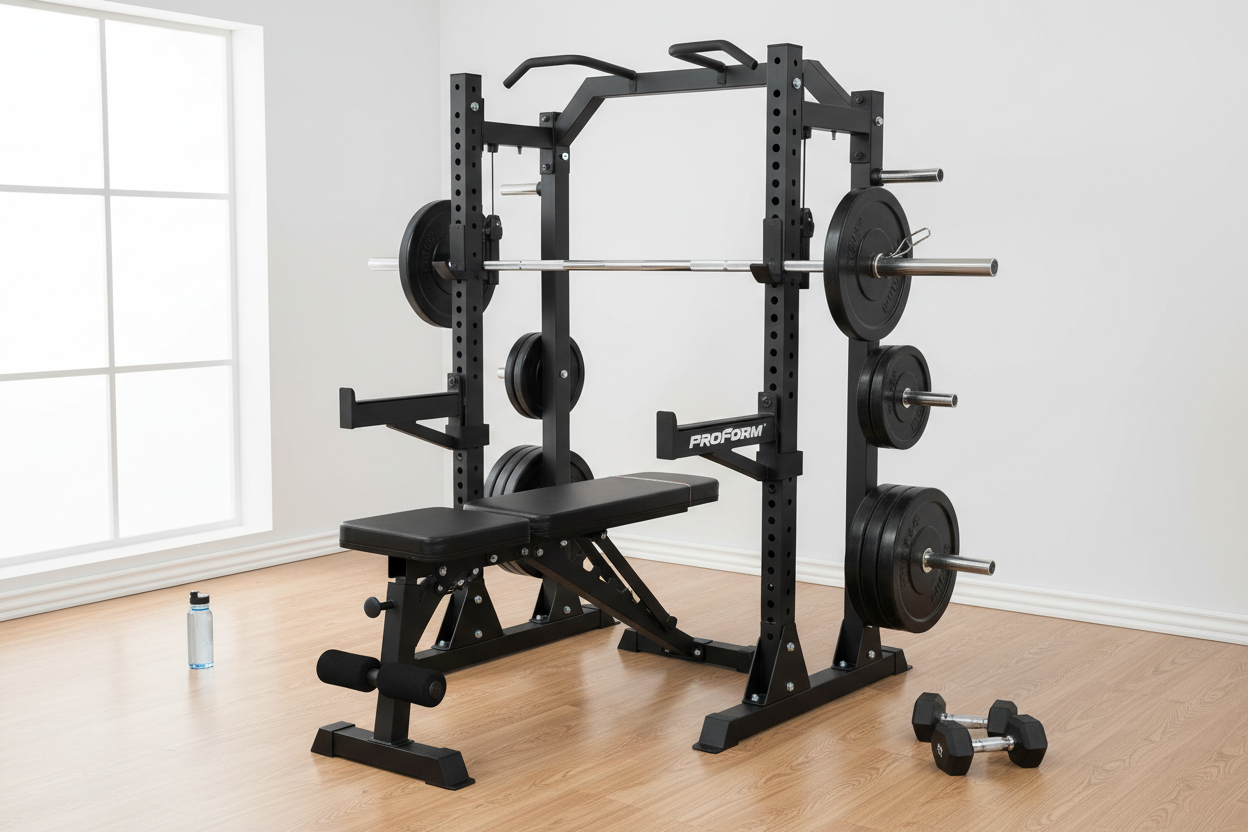
Beyond safety, a solid rack transforms a simple barbell into a full-body machine. With the right attachments, that steel frame handles pull-ups, dips, rack pulls, band work, and hanging leg raises. It becomes the station where 90% of your workout happens. When you look at it this way, allocating a larger portion of your budget to the frame makes more sense than overspending on fancy plates that just sit on the floor.
A Lesson Learned the Hard Way
I learned the value of sturdy equipment a few years into my lifting journey. I started with a flimsy, two-piece squat stand I found online for dirt cheap. It wobbled every time I racked the bar, and the "safety catchers" were barely three inches long. I convinced myself it was fine because I wasn't lifting elite numbers yet.
One evening, I was going for a personal best on the bench press. I was alone in the garage. The weight went down fine, but halfway up, my triceps quit. The bar stalled. Because I didn't have a full cage with proper safety pins, I had to do the "roll of shame," rolling a heavy barbell down my torso to my hips so I could sit up. It was painful, bruising, and incredibly dangerous. I ordered a full power rack with 11-gauge steel uprights and full-length safety bars the very next morning. The confidence boost was immediate. Knowing I could fail safely meant I added twenty pounds to my lifts within a month simply because I stopped lifting with fear.
Cage vs. Half Rack vs. Squat Stand
Understanding the terminology helps you pick the right tool for your space. A full power rack, often called a power cage, consists of four (sometimes six) vertical posts connected by crossmembers. You stand inside the cage to lift. This is the safest option because the safety bars are fully supported on both ends. If you have the space and the budget, this is the gold standard.
A half rack is essentially two uprights with a more stable base than independent stands. You lift in front of the uprights rather than inside them. These usually come with long spotter arms that extend out to catch the bar. They save floor space and often include plate storage on the back, making them a favorite for tighter garage setups.
Squat stands are the most minimalist option. Two vertical posts, sometimes connected at the base, sometimes independent. While great for portability and low ceilings, they offer the least stability and safety. If you plan on lifting heavy alone, a squat stand requires you to be very confident in your bail-out techniques.
Technical Specs You Can't Ignore
When browsing for a rack for gym use, the specifications tell you the real story. Ignore the marketing fluff and look at the steel gauge. You typically want 11-gauge steel or lower (lower numbers mean thicker steel). A 2x2 inch or 3x3 inch upright construction is standard. Anything thinner might feel unstable under heavy loads.
Hole spacing is another critical detail. Standard spacing is often two inches apart. However, the best racks feature "Westside" hole spacing through the bench zone. This means the holes are spaced only one inch apart near the bottom of the uprights. This allows you to set the safety pins at the exact height of your chest. With two-inch spacing, you often find that one setting is too high (limiting your range of motion) and the next is too low (crushing your ribcage before the bar hits the pins).
The Ecosystem of Attachments
Modern lifting gear is modular. Buying a rack is like buying a smartphone; you want one that supports the apps you use. In this case, the "apps" are J-cups, dip bars, landmine attachments, and lat-pulldown add-ons. Before purchasing, check the manufacturer’s ecosystem. Do they sell iso-lateral jammer arms? Do they have a monolift attachment? Even if you don't need these now, having a rack with standard sizing (like 3x3 with 5/8 inch holes) ensures you can upgrade later without selling your base unit.
Think about the finish as well. Powder coating isn't just for looks; it protects the steel from rust, which is vital if your gym is in a non-climate-controlled garage. However, on the pull-up bar, a heavy powder coat can be slippery. Many lifters prefer a knurled pull-up bar or raw steel for better grip.
Fitting the Rack to Your Life
Measure your ceiling height twice. Many lifters excitedly order a tall rack only to realize it won't clear their garage door opener or low basement ceiling. Remember that you need clearance not just for the rack, but for your head during pull-ups. If height is an issue, look for "short" versions of popular cages, which usually stand around 72 to 80 inches tall rather than the standard 90+ inches.
Your floor matters too. A heavy rack needs a level surface. If your garage floor has a significant slope for drainage, you might need to build a leveling platform. Bolting the rack to the floor or the platform is highly recommended. While heavy racks are stable, kipping movements or racking a heavy squat with force can shift even the heaviest unit. Bolting it down ensures it never tips, keeping you safe and your drywall intact.
Frequently Asked Questions
Do I really need to bolt my rack to the floor?
While many heavy-duty racks are stable enough to stand alone, bolting them down is always safer. If you perform dynamic movements like kipping pull-ups or use heavy band tension, securing the rack prevents tipping. If you cannot drill into concrete, consider a rack with a large, flat-footed base or build a wooden lifting platform to bolt into.
What is the difference between J-cups and J-hooks?
The terms are often used interchangeably to describe the hooks that hold the barbell on the uprights. High-quality versions usually have plastic liners (UHMW) to protect the knurling on your barbell from metal-on-metal contact. Always check the weight capacity of the hooks included with your rack.
Can I use a half rack for bench pressing safely?
Yes, provided the half rack comes with long safety spotter arms. These arms extend from the uprights to catch the bar if you fail a rep. Ensure the spotter arms are rated for the weight you plan to lift and are long enough to cover your natural bar path during the press.
