Mastering the Life Fitness Squat Machine for Safer Leg Growth
Let’s be honest: barbell squats aren't for everyone. Maybe your lower back flares up, or perhaps your gym is packed and the power racks are taken. This is where the life fitness squat machine enters the conversation. It isn't just a backup plan; for many lifters, it’s a superior tool for isolating the quadriceps without the systemic fatigue of free weights.
If you've been walking past this piece of equipment because you think machines are "cheating," you are leaving gains on the table. This guide breaks down how to use it effectively to build mass while keeping your joints happy.
Key Takeaways: Why Use This Machine?
- Reduced Spinal Loading: The weight rests on your shoulders with a guided path, significantly reducing shear force on the lumbar spine compared to free weights.
- Constant Tension: unlike a barbell where you might lock out and rest at the top, the Life Fitness machine mechanics encourage continuous tension on the quads.
- Fixed Stability: The machine handles the stabilization, allowing you to focus purely on the drive and muscle contraction.
- Safety Failure Points: Built-in safety stops mean you can train to failure without needing a spotter.
Understanding the Biomechanics
The Life Fitness squat machine operates on a fixed plane of motion. This is the biggest differentiator from a barbell. In a free squat, you have to manage the weight in three-dimensional space, stabilizing forward, backward, and side-to-side.
On this machine, that stabilization is removed. This sounds like a downside, but for hypertrophy (muscle growth), it's a benefit. Because your stabilizers aren't the limiting factor, you can push your quads and glutes closer to true muscular failure.
The Arc vs. Linear Path
Depending on the specific Life Fitness model (some are plate-loaded, some selectorized), the motion might be slightly arc-like or perfectly linear. Understanding this path dictates your foot placement. If the machine moves in an arc, your body position changes slightly throughout the rep, mimicking a natural squat pattern more closely.
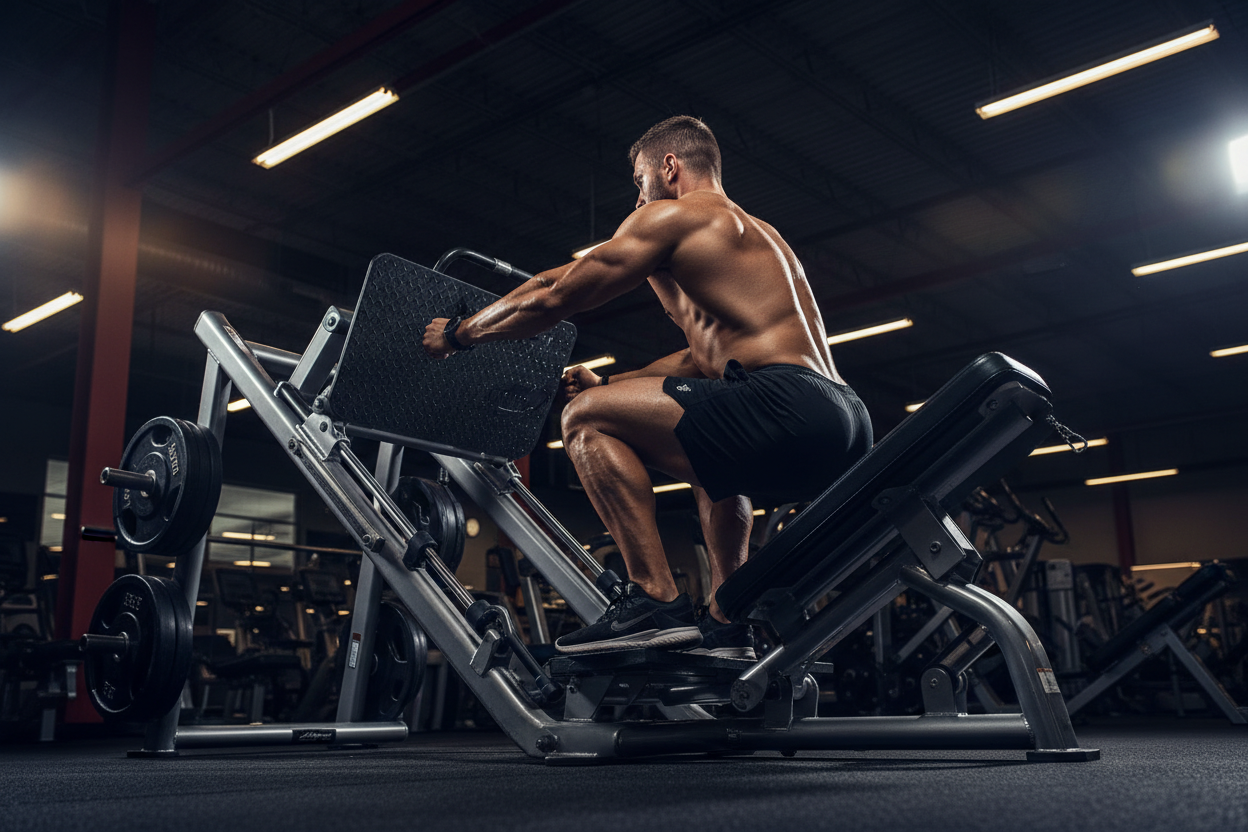
Proper Setup and Execution
Most people hop on, guess the weight, and start pumping. That’s how you wreck your knees. Precision is key here.
1. Foot Placement is Everything
Where you place your feet changes the muscle bias. Placing your feet lower on the platform increases knee flexion, targeting the quads heavily. However, this increases shear force on the knee.
Placing your feet higher recruits more glutes and hamstrings and is generally safer for those with knee issues. Start with a shoulder-width stance, toes pointed slightly out.
2. Pad Adjustment
The shoulder pads should rest comfortably on your traps, not your neck. If the machine is adjustable, set it so you start the movement from a nearly standing position, but with a slight bend in the knees. You never want to start a set by tiptoeing the weight up.
3. The Descent (Eccentric)
Lower the weight slowly. Aim for a 3-second count on the way down. Stop when your thighs are at least parallel to the footplate. Bouncing out of the bottom uses momentum, not muscle, and risks injury.
Common Mistakes That Kill Progress
The "Ego" Range of Motion: Loading up five plates but only moving three inches down is useless. Drop the weight and hit full depth. Your legs will grow faster with half the weight and full range of motion.
Heel Lift: If your heels are popping off the platform at the bottom of the rep, your foot placement is too low or your ankle mobility is poor. This puts massive stress on the patellar tendon. Keep your heels glued down.
My Training Log: Real Talk
I’ve logged hundreds of hours on various Life Fitness leg machines, specifically the plate-loaded versions. Here is something the manual won't tell you: the shoulder pads are dense.
Unlike cheaper brands where the foam collapses and the metal digs into your clavicle, these pads hold up, but they can be slippery if you're sweating heavily. I found that wearing a cotton shirt (rather than a slick synthetic tank top) is crucial for friction. If you slide under the pads, your lower back arch collapses, and the lift feels terrible.
Also, there's a specific "catch" point on the safety handles. On older gym units, I've noticed the release mechanism can be a bit sticky. I always do one "dry run" rep with just the carriage weight to make sure the safety latches disengage smoothly before I load up 400 lbs. Nothing ruins a set faster than getting stuck at the bottom because the handle jammed.
Conclusion
The Life Fitness squat machine isn't a replacement for the barbell squat, but it is a powerful companion. It allows you to overload the legs safely and push past failure without the fear of getting crushed. Treat it with the same respect you give free weights—focus on form, control the negative, and leave your ego at the door.
Frequently Asked Questions
Does the Life Fitness squat machine hurt your back?
Generally, no. It is designed to be safer for the back than barbell squats because the weight is stabilized. However, if you round your back or place your feet too far forward, you can still cause strain. Keep your core braced throughout the movement.
How much does the carriage weigh on a Life Fitness squat machine?
This varies by model, but the starting resistance (the weight of the carriage without plates) is typically between 45 lbs and 75 lbs. It is significantly heavier than a standard 45lb barbell, so factor that into your warm-ups.
Is the squat machine better than the leg press?
It isn't "better," just different. The squat machine requires hip extension similar to a standing squat, engaging the glutes and core more than a leg press. The leg press removes the upper body entirely, allowing for maximum isolation but less functional crossover.
