Building the Ultimate Garage Gym: Choosing the Right Rack for Starting Strength
You have bought the book, learned the mechanics of the low-bar squat, and committed to the idea of linear progression. The concept is simple: add five pounds to the bar every session until you can’t. But there is a physical reality to this simplicity that novice lifters often overlook. As the weight on the bar goes up, the margin for error goes down. The equipment you choose stops being just a tool and becomes a critical safety component. This is particularly true for the centerpiece of your home gym.
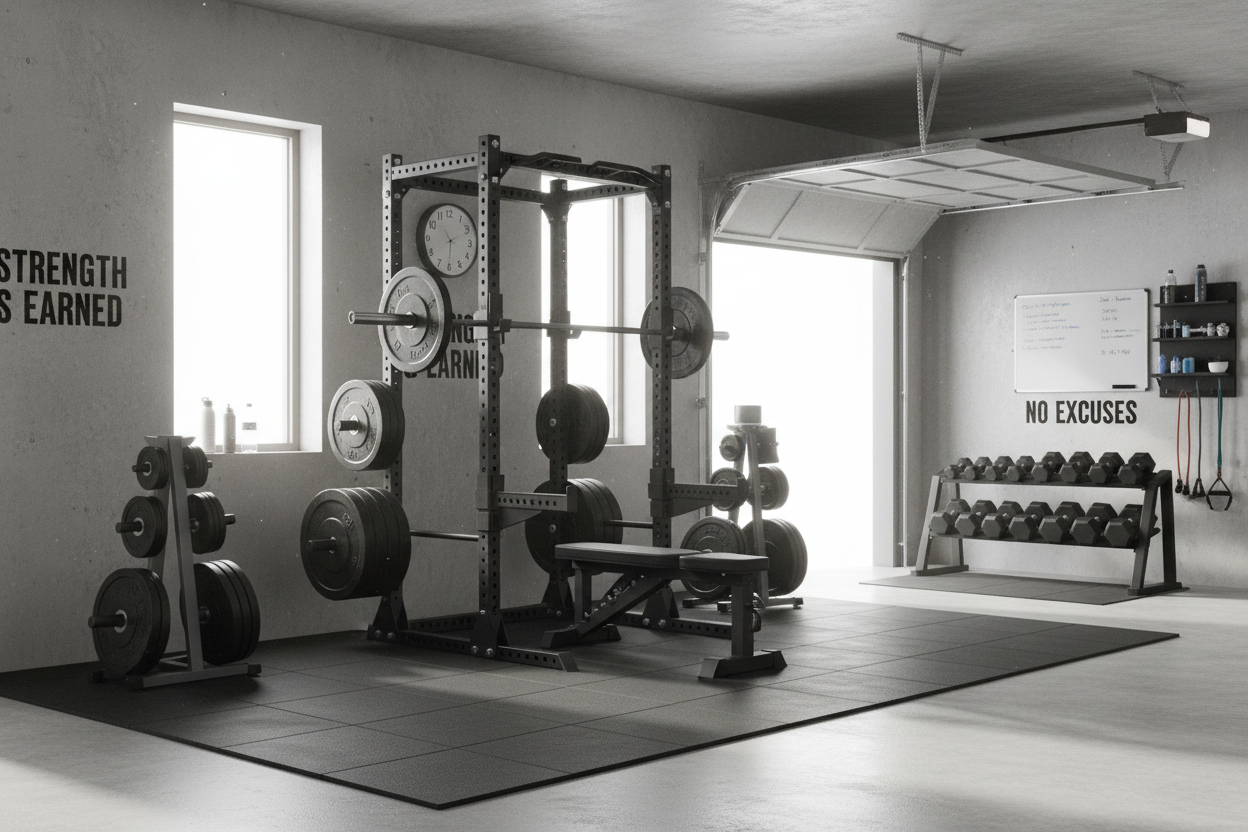
To answer the most pressing question immediately: a proper rack for the Starting Strength method is not just any frame of steel. You need a power rack or a heavy-duty squat stand with robust safety spotters capable of handling loads well beyond your current max, constructed from at least 11-gauge steel. If you are training alone, a full power rack is superior because it offers a fully enclosed safety environment for both the squat and the bench press. Do not cut corners here; a failed rep on a flimsy stand can end your lifting career before it truly begins.
Why the Program Demands Heavy Steel
Starting Strength is unique because of its relentless focus on heavy compound movements. Unlike bodybuilding programs that might rely on machines or dumbbells, this methodology lives and dies inside the rack. You will be squatting three days a week. You will be pressing or benching every session. The equipment takes a beating.
I remember my first attempt at building a home setup. I tried to save money by purchasing a generic, independent squat stand from a big-box store. It was rated for 300 pounds, which felt like a mile away when I was struggling with an empty bar. Three months later, I was squatting 275 pounds. During a particularly grindy rep, I shifted my weight, and the independent uprights wobbled terrifyingly. The metal groaned, and the lack of a crossmember made racking the weight feel like a balancing act. I sold it the next day. The lesson cost me time and money, but it taught me that stability is not a luxury.
Defining the Starting Strength Power Rack
When enthusiasts discuss a starting strength power rack, they are often referring to a specific set of design criteria championed by Mark Rippetoe. While various manufacturers produce racks that fit these needs, the specifications are what matter. The rack needs to be rigid. If the uprights move when you slam the bar back into the J-cups after a heavy set of five, the rack is insufficient.
The depth of the rack is a surprisingly controversial topic. Many commercial racks are 40 to 50 inches deep. However, for this program, a shallower depth—often around 24 to 30 inches inside—is frequently preferred. This might seem counterintuitive, but a shallower rack is structurally more rigid (less leverage for sway) and easier to bolt down securely. Furthermore, you don't need a dance floor to squat. You need just enough room to step back, set your feet, and move the bar vertically. Excess space often encourages taking too many steps during the walkout, wasting energy you need for the lift.
The Importance of Through-Pin Safeties
Safety mechanisms are the primary reason you buy a rack. In the context of this program, you will eventually fail a rep. It is part of finding your limit. A starting strength rack design prioritizes simple, indestructible safety systems. Pins or pipes that slide through the uprights are generally preferred over straps for novices. While straps protect the knurling on the bar, steel pins offer a hard, immutable stop. When you are stuck at the bottom of a squat or the bar is descending toward your throat on a bench press, you want the absolute certainty of solid steel catching that load.
The Squat Stand Alternative
Not everyone has the ceiling height or floor space for a full cage. In these instances, a starting strength squat rack (often an open half-rack design) is the viable alternative. However, the requirements for robustness increase here. Since there are only two uprights, the base must be incredibly heavy and long to prevent tipping.
If you go this route, spotter arms are non-negotiable. These are steel arms that extend from the front of the uprights. The danger with spotter arms on a cheaper unit is that dropping a heavy barbell on the end of the arm can cause the entire unit to tip forward. If you choose a squat stand, you must ensure the spotter arms are long enough to catch a missed bench press but the unit is heavy enough (or bolted down) to remain grounded during a catastrophic failure.
Material and Build Quality
You will hear terms like "3x3" and "11-gauge" thrown around in equipment forums. This refers to the size of the steel tubing (3 inches by 3 inches) and the thickness of the metal walls. For the Starting Strength novice linear progression, 2x3 steel is adequate, but 3x3 has become the modern standard for good reason. It allows for modularity and maintains value better over time.
Another specific detail often discussed in Starting Strength circles is the hole spacing. Westside spacing (1-inch spacing through the bench zone) is popular in powerlifting, but standard spacing is usually sufficient for the novice. The critical factor is that the holes are consistent and numbered. You do not want to spend ten minutes before every workout guessing where your J-cups should go. The program requires efficiency; your equipment should facilitate that.
Bolting It Down
Regardless of whether you buy a massive cage or a smaller stand, the connection to the floor is vital. Many lifters hesitate to drill into their garage concrete. They rely on the weight of the rack or plate storage to hold it in place. This is a mistake. A rack that is bolted to the floor becomes a structural part of the building. It does not slide, it does not tip, and it transfers force directly into the foundation. For a program that relies on hip drive and explosive movement out of the bottom of the squat, a rigid, bolted rack provides a tactile feedback that a floating rack cannot match.
The Minimalist Philosophy
One final aspect to consider is the "noise" of the equipment. Modern fitness gear is often sold with endless attachments: landmines, dip bars, cable pulleys, and band pegs. While fun, these are distractions for a novice. The Starting Strength model is minimalist. You need to Squat, Press, Bench, Deadlift, and Power Clean. A rack covered in clutter can actually hinder your training.
The ideal rack for this journey is one that disappears during the workout. It shouldn't rattle. It shouldn't require constant adjustment. It should simply be a heavy, dumb piece of iron that holds the bar exactly where you need it and catches the bar if gravity wins. By investing in quality steel upfront, you ensure that the only limit to your progress is your own recovery and will, not the fear of your equipment collapsing.
Frequently Asked Questions
Do I absolutely need to bolt my rack to the floor?
Yes, it is highly recommended. While some "flat foot" racks claim to be stable without bolting, bolting ensures zero movement during racking and unracking, which is safer and provides a better lifting experience, especially as weights get heavy.
Can I use a half-rack for Starting Strength?
Yes, provided it has long, heavy-duty spotter arms. You must be able to set the spotter arms at a height that allows you to bench press safely without the bar crushing you if you fail a rep.
What is the ideal rack depth for a home gym?
For most home gyms following this program, a 24-inch or 30-inch internal depth is ideal. This saves floor space while providing enough room to squat comfortably without the excessive walkout required by deeper commercial cages.
