Why the Nordic Push Up Might Be the Missing Link in Your Leg Training
Most people treat their hamstrings as an afterthought. We obsess over squats and lunges, building massive quadriceps, while the muscles on the back of our legs get a few token sets on a seated curl machine. This imbalance isn't just an aesthetic issue; it is a primary driver of knee injuries and athletic stagnation. If you are looking for a bodyweight solution that rivals heavy deadlifts for posterior chain development, you are looking for the Nordic curl. However, because the full movement is incredibly difficult, most athletes start with a variation often called the nordic push up.
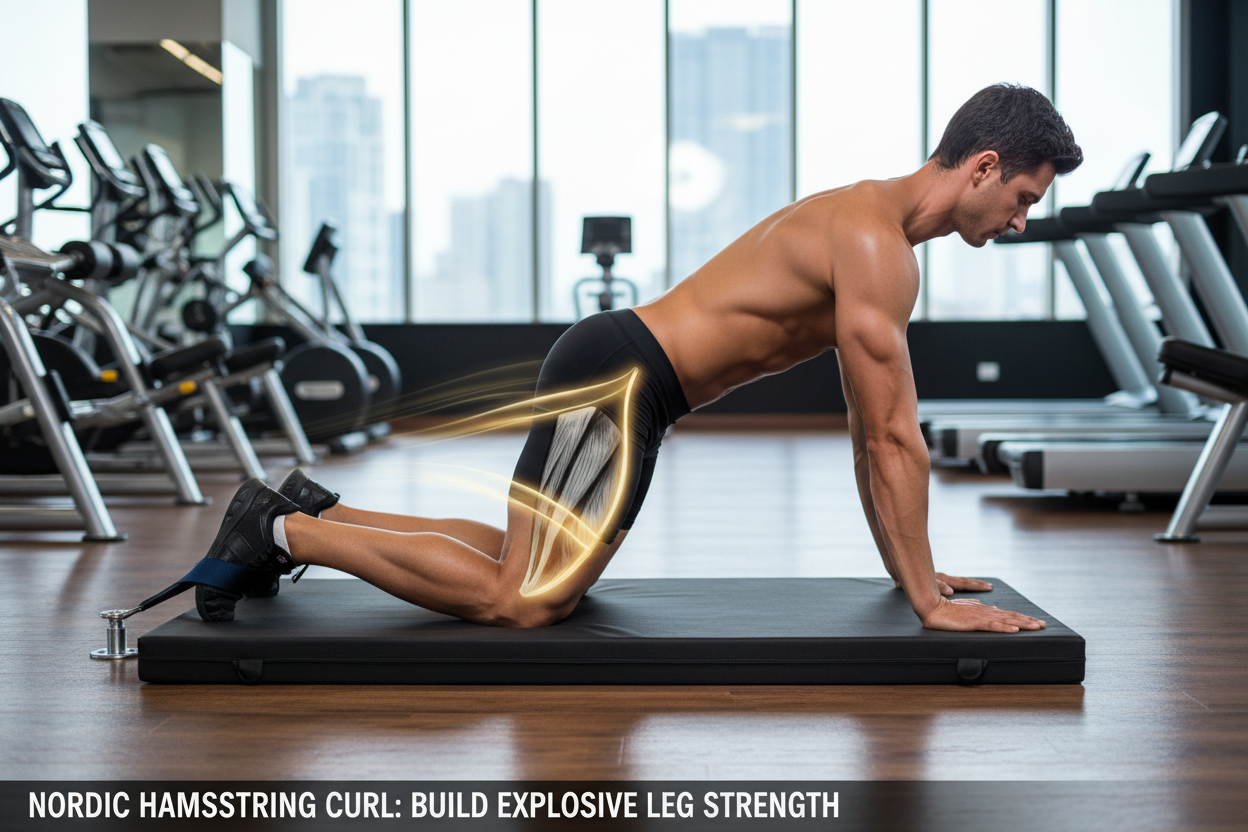
The concept is simple but brutal. You anchor your feet, lower your body toward the ground using only your hamstrings, and then use your arms to push yourself back to the starting position. This allows you to overload the eccentric (lowering) phase of the movement, which is where the majority of strength gains and injury prevention benefits occur. You don't need a barbell or a machine—just something heavy to hold your ankles and a high tolerance for discomfort.
The Mechanics of the Movement
To understand why this exercise works, you have to look at how the hamstring functions. It is a bi-articular muscle group, meaning it crosses two joints: the hip and the knee. Most leg exercises, like deadlifts, work the hamstring at the hip. Leg curls work the hamstring at the knee. The nordic push up is unique because it places the hamstrings under immense tension while the hips are extended and the knees are extending. This specific position mimics the mechanics of sprinting, particularly the moment the foot strikes the ground.
When you perform the lowering phase, you are lengthening the muscle fibers under load. This eccentric stress triggers a specific type of hypertrophy where the muscle fibers actually grow longer (adding sarcomeres in series). Longer, stronger muscle fibers are significantly more resilient to tearing. This is why this movement is the gold standard for preventing ACL tears and hamstring strains in professional sports.
My First Encounter with the Floor
I remember the first time I confidently attempted this movement without understanding the leverage involved. I had been squatting heavy for years and assumed my legs were bulletproof. I hooked my heels under a loaded barbell, kept my back straight, and began to lean forward. I made it about six inches before my hamstrings simply quit. It felt like someone had unplugged the power cord to the back of my legs.
I didn't control the descent; I crashed face-first into the gym mat. The cramping that followed was immediate and severe. That failure taught me a valuable lesson about leverage. The further your torso moves from your knees, the heavier you become effectively. My hamstrings weren't weak in a general sense, but they were woefully unprepared for that specific angle of tension. I had to swallow my pride and regress the movement, relying heavily on the push-up reset to get back to the top. It took me nearly six months of consistent practice to control the descent all the way to the floor.
Executing the Nordic Push Up Correctly
Proper form is non-negotiable here. If you break at the hips, you negate the benefits. Here is how to set it up:
Find a soft surface for your knees. This is crucial because your kneecaps will be acting as the fulcrum for your entire body weight. Next, secure your ankles. You can use a partner, a loaded barbell, or a dedicated strap. Your feet should be dorsiflexed (toes pulled toward shins) or plantarflexed (toes pointed away), depending on comfort, though dorsiflexed usually offers better leverage.
Start in a tall kneeling position. Squeeze your glutes to drive your hips forward. Your body should form a straight line from your shoulders to your knees. Begin to fall forward slowly. Resist gravity with everything you have. The goal is to lower yourself as slowly as possible. Once you can no longer hold the tension and gravity wins, catch yourself with your hands. This is where the "push up" part comes in. explosively push yourself off the floor back to the starting position. Do not try to pull yourself up with your hamstrings alone if you aren't ready; you will likely strain something.
The Role of the Hamstring Push Up
You might hear this regression referred to as a hamstring push up in some circles. While the terminology varies, the intent is the same: using the upper body to assist the lower body. The push-up phase is not just a reset; it is a safety mechanism. By using your arms to return to the top, you save your energy for the eccentric phase, which is where the magic happens.
The hamstring push up allows you to accumulate volume. If you only performed reps where you could pull yourself back up, you might get one or zero reps. By turning it into a controlled fall and a push-up reset, you can perform sets of 5 to 10 reps. This volume is necessary to drive the physiological adaptations required for stronger knees.
Common Mistakes to Avoid
The most common error is bending at the waist. As the movement gets hard, your brain will try to shorten the lever arm to make it easier. You will instinctively shoot your butt back. While this allows you to go lower, it shifts the tension off the hamstrings and onto the lower back and glutes in a way that defeats the purpose of the exercise. If you film yourself, your hip angle should remain open (180 degrees) throughout the entire descent.
Another mistake is rushing the drop. The exercise isn't about reaching the floor; it is about the time spent fighting the floor. If you just drop and do a plyometric push-up, you are doing a chest exercise, not a leg exercise. Fight for every inch of the descent.
Programming and Progression
Treat this exercise as a primary strength movement, not a warm-up. Because it is extremely taxing on the central nervous system and causes significant muscle damage (due to the high eccentric load), you don't need high frequency. Doing this once or twice a week is sufficient for most people.
Start with 3 sets of 5 reps. Focus on a 3-5 second descent. If you can't control the descent at all, use a resistance band attached to a pull-up bar behind you. Hold the band at your chest to offload some of your body weight. As you get stronger, use a lighter band, and eventually, no band.
Once you master the eccentric phase, you can try to eliminate the push-up. Go down, pause just above the floor, and pull yourself back up. That is the full Nordic curl, a feat of strength that very few gym-goers ever achieve. Until then, the nordic push up remains one of the most effective tools in your arsenal for building a posterior chain that performs as well as it looks.
Why It Matters for Longevity
Knee pain is often a symptom of hips and hamstrings that aren't doing their job. When the hamstrings are weak, the quads take over, increasing shear force on the knee joint. By dedicating time to this grueling exercise, you are essentially buying insurance for your knees. It improves your ability to decelerate, which is how most non-contact injuries happen in sports. Whether you are a runner, a lifter, or just someone who wants to walk up stairs without pain in their 60s, mastering the control of your own body weight through this range of motion is invaluable.
FAQ
Can I do Nordic push ups if I have a history of knee pain?
Yes, but proceed with caution. Ensure you have significant padding under your knees to avoid direct pressure pain. Start with a limited range of motion or use a resistance band for assistance to reduce the load on the joint until your tendon strength improves.
How often should I train hamstrings with this intensity?
Due to the high eccentric damage caused by this movement, one to two sessions per week is optimal. Your hamstrings take longer to recover than muscles like the calves or deltoids, so allow at least 72 hours between heavy sessions.
What is the difference between a glute-ham raise and a Nordic curl?
A glute-ham raise is typically done on a specific machine with a rounded pad that allows for more hip involvement and a changing leverage point. The Nordic curl (or nordic push up) is done on a flat surface, creating a fixed pivot point at the knee which creates significantly higher tension on the distal hamstrings.

