Why a Heavy Bar and a Sturdy Rack Are the Only Gym Memberships You Need
Most people overcomplicate strength training. They walk into a commercial facility, see rows of shiny isolation machines, ellipticals, and cable stations, and assume that complexity equals results. The reality is much simpler and, frankly, much harder work. If you strip away the marketing and the fluff, the most effective tool for changing human body composition remains a straight steel bar and a structure to hold it. Building a physique capable of moving real weight requires stability, tension, and the ability to incrementally increase the load over time. You don't need a monthly subscription to achieve that; you need gravity and iron.
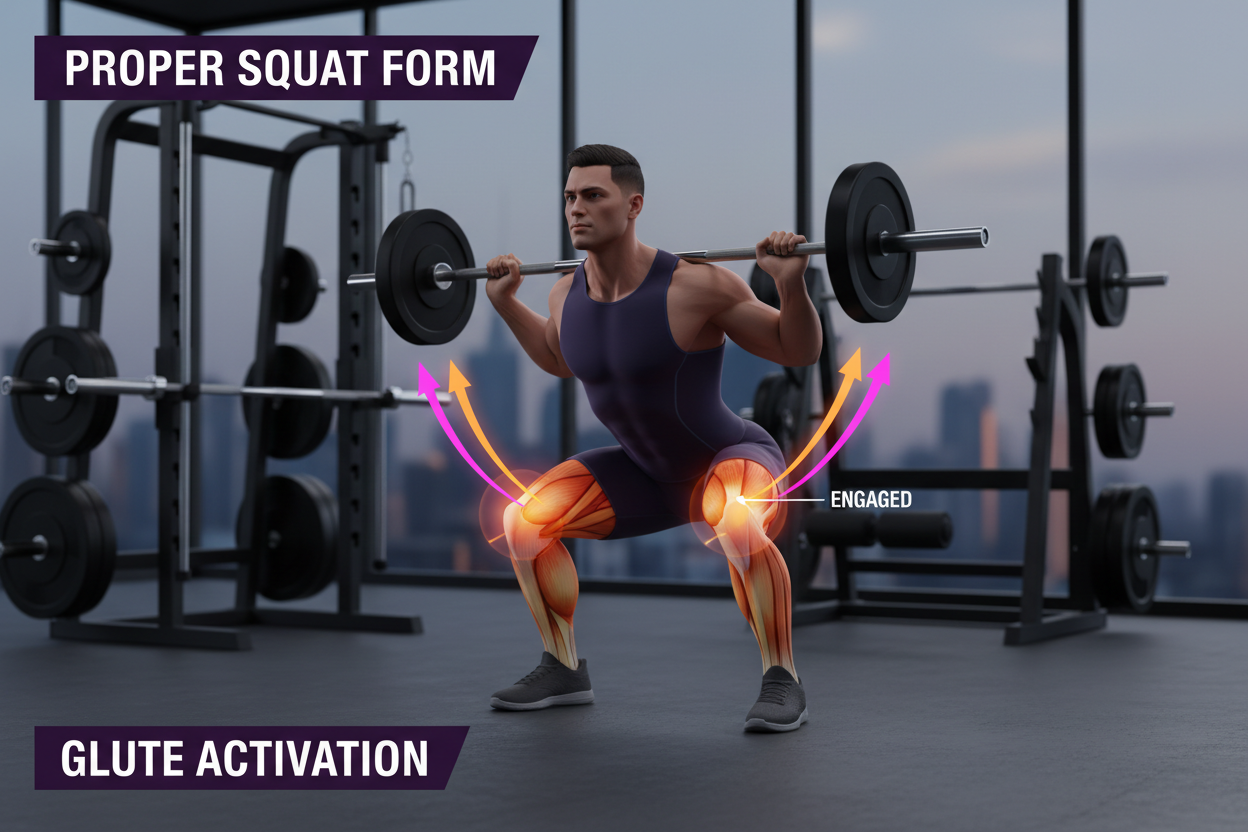
The core philosophy here is progressive overload on compound movements. Exercises like the squat, overhead press, bench press, and deadlift recruit the maximum amount of muscle mass in the shortest amount of time. While dumbbells have their place for accessory work, they eventually become difficult to position once you get strong. Machines lock you into a fixed path of motion that might not agree with your specific biomechanics. A barbell, however, moves with you. It demands that you stabilize the load, engaging your core and smaller stabilizer muscles in a way a leg press never will. To perform these lifts safely and effectively, specifically alone, the centerpiece of your setup must be a reliable squat rack and barbell set.
The ROI of Lifting Heavy at Home
I remember the specific moment I decided to quit my local gym. It wasn't the price, and it wasn't even the commute. It was a Tuesday evening, waiting twenty minutes for a college kid to finish texting on the only power rack in the building. My workout, which should have taken 45 minutes, stretched into ninety. That frustration led me to clear out a corner of my garage. I started small, but I quickly realized that buying cheap equipment is a trap. I initially bought a flimsy two-piece stand that wobbled every time I racked the weight. It was terrifying.
Upgrading to a proper cage changed everything. The confidence you get from knowing you can fail a lift without being crushed is invaluable. When you have safety spotter arms set at the right height, you can push for that final, grinding repetition on a bench press or a squat. That last rep is often where the actual growth happens. In a commercial gym, unless you ask a stranger for a spot, you usually leave one or two reps in the tank just to be safe. At home, with a solid rig, you can safely go to failure. That difference in intensity accumulates over months and years, leading to significantly better strength gains.
Understanding the Hardware
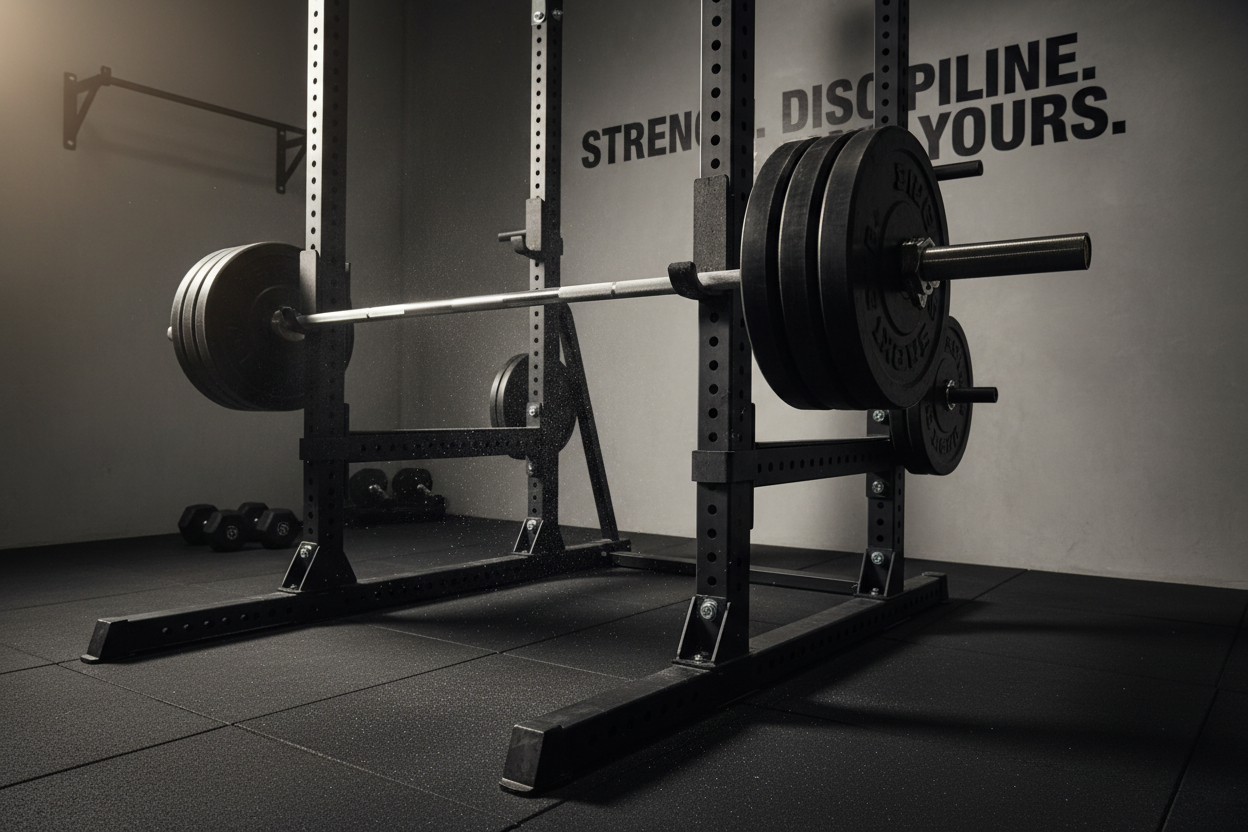
When you start looking for a bar and rack set, the terminology can get murky. You generally have three options for the structure: a full power cage, a half rack, or a squat stand. For most people serious about safety and versatility, the full power cage or a robust half rack is the superior choice. A squat stand is better than nothing, but it often lacks the lateral stability needed for heavy lifting and usually doesn't offer the same level of safety features.
The rack is only half the equation. The barbell is the interface between you and the weight. It is the piece of equipment you will touch every single session. A cheap bar with poor knurling (the crosshatch pattern on the metal) will slip in your hands when things get heavy. Worse, cheap bars can bend permanently if you drop them or load them heavily. You want a bar with a decent tensile strength and sleeves that spin freely. If the sleeves don't spin, the rotation of the plates generates torque that transfers directly to your wrists and elbows, which is a recipe for tendonitis.
Versatility Beyond the Big Three
There is a misconception that a rack is only for powerlifters. While it is essential for the big three lifts, a well-designed station is essentially an adult jungle gym. With a pull-up bar attached to the top—which is standard on almost every modern squat rack and barbell set—you immediately have access to the best upper body pulling exercise in existence. Add a set of gymnastics rings draped over the top, and you can do dips, rows, and face pulls.
You can also perform rack pulls to overload your back, overhead presses inside the cage for safety, and hanging leg raises for core development. By adjusting the height of the J-cups (the hooks that hold the bar), you can set up for essentially any height-dependent movement. This single footprint in your garage or basement replaces the leg press, the chest press machine, the lat pulldown (if you do weighted pull-ups), and the smith machine. It is the ultimate efficiency hack.
Safety Mechanisms and Solo Training
The primary hesitation most people have regarding home training is safety. The fear of getting pinned under a heavy bench press is rational. This is why the specific design of your gear matters. A proper bar and rack set will come with safety pins, straps, or arms. These are horizontal barriers that you set just below the bottom range of your motion. If you can't lift the weight back up, you simply lower it an inch further, and the rack takes the load, not your chest or neck.
I cannot stress enough that these safeties need to be rated for high weight. I have seen cheap, generic stands bend under loads that weren't even particularly heavy. When you are shopping, look for steel gauge thickness (11-gauge is the gold standard for home gyms) and weight capacity ratings. You might not be lifting 500 pounds today, but buying equipment that can handle 1000 pounds ensures that it won't fail when you are lifting 300.
Making the Investment
Building a home setup requires an upfront cost, but the math works out in your favor surprisingly fast. Compare the cost of a mid-range commercial gym membership over three years against the one-time purchase of a durable setup. The equipment holds its value incredibly well. Iron doesn't expire. A cast-iron plate from 1980 weighs the same as one made today. If you ever decide to sell, you can often recoup a large percentage of your initial spend. You cannot sell a used gym membership.
Focus your budget where it counts. You don't need calibrated plates or a monolith attachment right away. Put your money into the barbell and the rack. You can lift sandbags, concrete blocks, or cheap used plates, but you cannot compromise on the structural integrity of the cage or the mechanics of the bar. Once you have that foundation, you have everything required to build a world-class physique without ever waiting for a machine again.
Frequently Asked Questions
How much space do I actually need for a home gym setup?
You generally need a footprint of about 8 feet by 8 feet. A standard Olympic barbell is roughly 7 feet long, and you need a few inches of clearance on either side to load plates comfortably. The rack itself usually occupies a 4x4 foot area, but the working space is the main constraint.
Can I use a standard 1-inch bar instead of an Olympic 2-inch bar?
While possible for beginners, it is not recommended for serious training. Standard bars have a much lower weight capacity (often bending at 200lbs) and the ends don't rotate, which can cause joint strain. An Olympic bar is the industry standard for a reason and opens up access to better quality plates and racks.
Do I need to bolt my rack to the floor?
If you are performing dynamic movements like kipping pull-ups or lifting very heavy weight that requires aggressive racking, bolting it down is safer. However, many modern racks with a "flat foot" base are designed to be stable without bolting, provided you weigh them down with plate storage.