Stop Waiting for the Squat Rack: Building the Ultimate Garage Setup
There is a specific kind of freedom that comes with canceling your commercial gym membership. No more waiting for equipment, no more wiping down someone else’s sweat, and no more commuting. Moving your training to your home is one of the best investments you can make for your long-term health, but it requires a shift in perspective regarding equipment. The centerpiece of this transformation is invariably the rack. It is the church of iron where the most effective compound movements happen.
When you start planning your setup, you quickly realize that not all equipment is created equal. The market for garage gym racks has exploded, offering everything from fold-away wall mounts to massive six-post cages. Choosing the right one isn't just about budget; it is about understanding the geometry of your space and how you intend to train. If you buy a cheap treadmill, it becomes a clothes hanger. If you buy the wrong rack, you might actually endanger yourself or damage your property.
My Transition to the Garage
I remember the week I finally pulled the trigger on my own setup. I spent hours with a tape measure in a cold, dusty two-car garage, trying to figure out if I could overhead press without punching a hole in the drywall ceiling. I had been lifting for over a decade in commercial facilities, so I took safety features for granted. In a commercial gym, the equipment is bolted down and built like a tank. In my garage, I had to account for the slope of the concrete floor—most garages slope toward the door for drainage—and the limited depth.
I ended up going with a flat-foot garage gym power rack because I wasn't ready to drill into the concrete slab yet. The first time I racked a heavy squat and the structure didn't budge, I knew I had made the right choice. That solitude, just me and the iron at 6:00 AM with the garage door cracked open for airflow, completely changed my relationship with training. It wasn't a chore anymore; it was a ritual.
Defining the Centerpiece
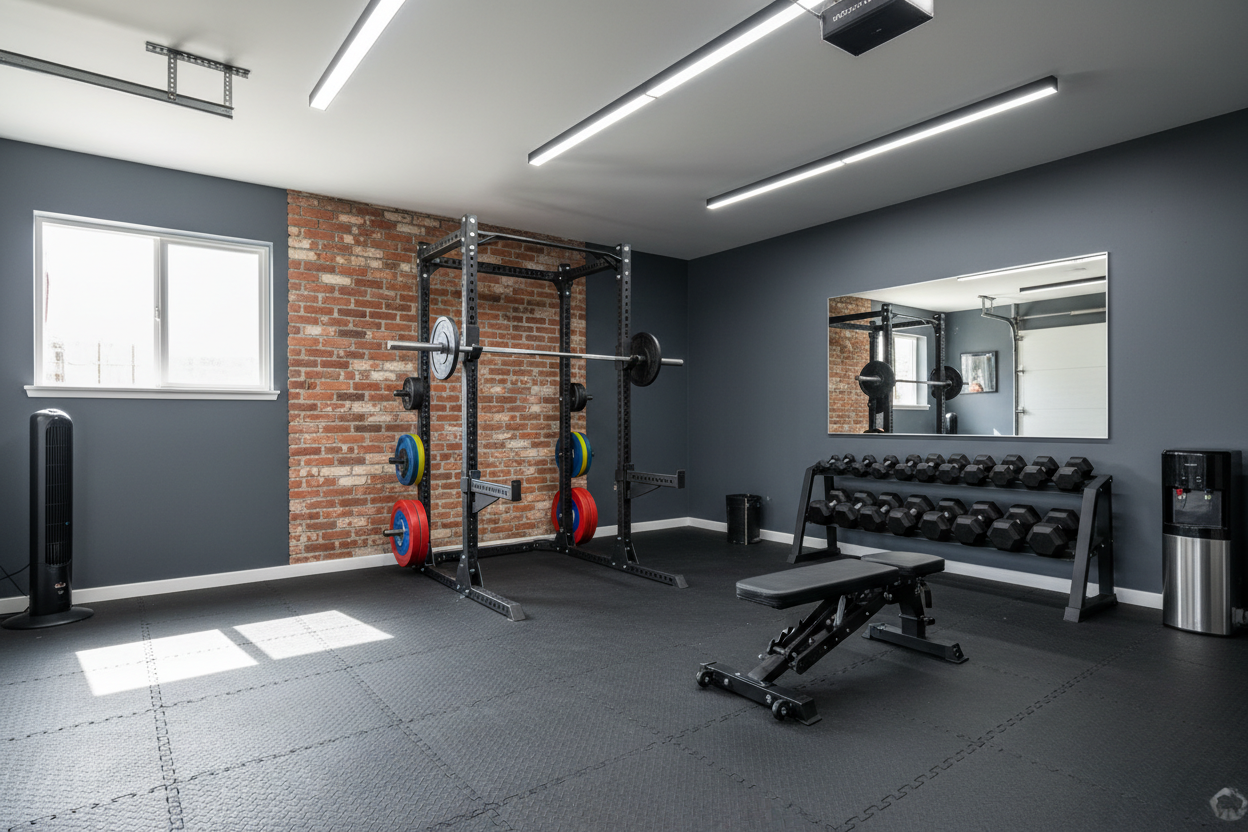
The rack serves as your spotter when you are training alone. This is the non-negotiable function. When you are browsing through power racks reviews, you will see a lot of talk about finish options, colors, and laser-cut logos. While those are nice, your primary focus should be on the safety systems. You need reliable J-cups to hold the bar and, more importantly, robust safety safeties—either straps, pins, or flip-down spotter arms. If you fail a rep on the bench press in a commercial gym, someone helps you. In your garage, the rack has to save you.
Steel gauge is another technical spec that matters. Most high-quality racks are built with 11-gauge steel. If you go with a higher number (which means thinner steel, like 14-gauge), the rack may wobble under heavy loads. For a dedicated lifting space, 2x3 or 3x3 inch steel uprights are the standard. They provide the stability required for heavy squats and weighted pull-ups without the entire structure shaking.
Space Constraints and Ceiling Height
The biggest hurdle for most home gym owners is vertical space. A standard workout rack for garage usage usually comes in two height variations: a "short" version (typically around 80 to 84 inches) and a standard version (around 90 inches). Before you add anything to your cart, measure your ceiling height at the lowest point, which is usually the garage door tracks. You need clearance not just for the rack, but for your head during pull-ups.
If you are tight on space, you don't necessarily need a full four-post cage. Half racks and squat stands have smaller footprints and feel less claustrophobic in a tight single-car garage. However, full cages offer the highest level of safety because you are lifting inside the structure. If the bar slips, it hits the safeties, not your floor or your feet.
The Evolution of the Garage Power Rack
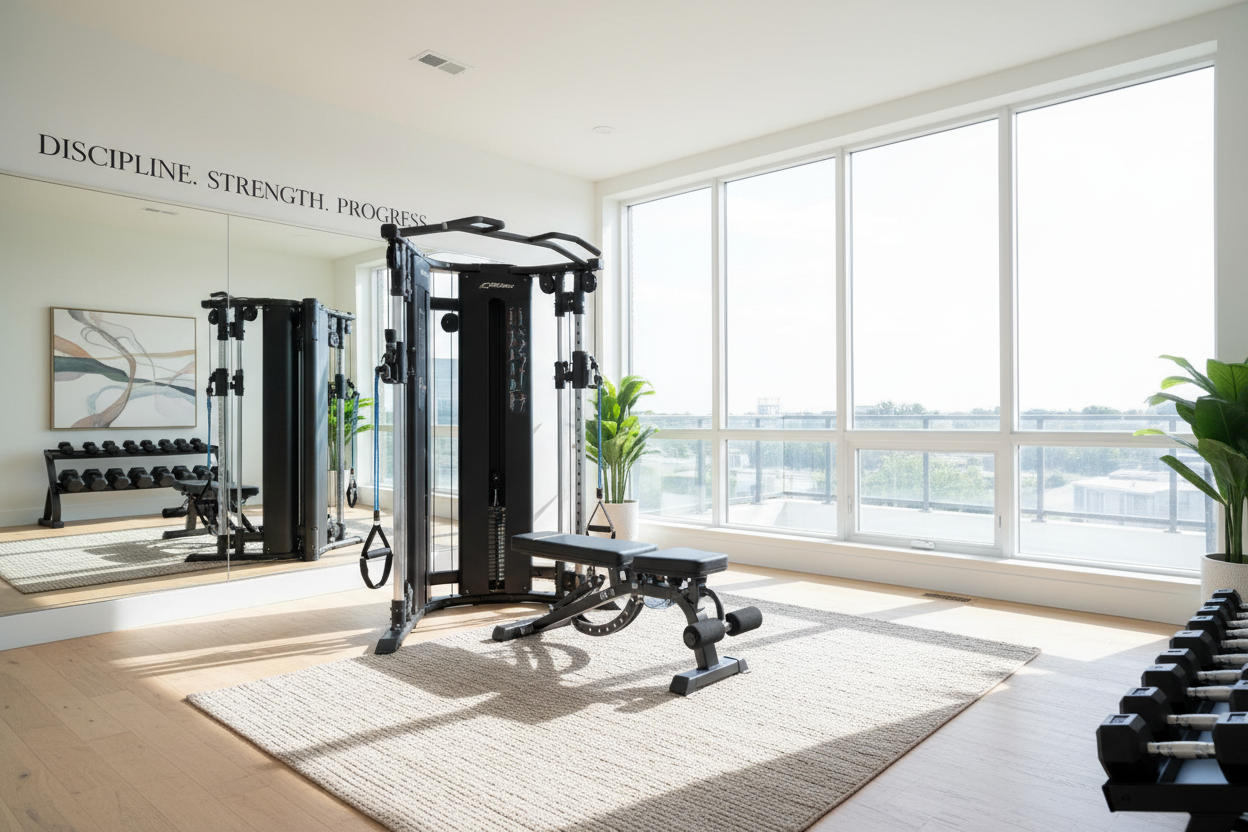
Years ago, home equipment was flimsy. Today, the garage power rack is often built to the same specifications as equipment found in Division 1 collegiate weight rooms. This evolution means you can customize your setup over time. This is the concept of the "ecosystem." When you buy a rack from a reputable manufacturer, you aren't just buying steel uprights; you are buying into a system of attachments.
You might start with just the rack and a barbell. Six months later, you can add dip bars, landmine attachments, iso-lateral lever arms, or cable pulley systems that attach directly to the uprights. This modularity is what makes a rack the most versatile piece of equipment you will ever own. It transforms from a simple squat stand into a comprehensive functional trainer.
Wall-Mounted vs. Free-Standing
A popular trend for multi-use spaces is the folding rack. These units mount to the wall and swing inward when not in use, sitting only a few inches from the wall. If you still need to park a car in your gym space, this is likely the best garage gym rack solution for you. They are surprisingly sturdy, but they do require significant installation effort. You must lag bolt stringers across your wall studs to ensure the structure can handle the load.
Free-standing racks, on the other hand, dominate the floor. They claim their territory. A flat-foot rack doesn't need to be bolted down, which is great for protecting your foundation, but a bolt-down rack offers zero movement. Your choice depends entirely on whether the garage is a dedicated gym or a shared space.
Making the Investment
Building a home gym is a process of curation. You don't need to buy everything at once, but you do need to get the foundation right. Cheap benches wobble, and cheap bars bend, but a cheap rack is a safety hazard. Look for 1-inch hole spacing through the bench zone (often called Westside spacing) which allows you to set the safeties at the exact right height for your chest. Without this, you might find yourself in a position where the safety is either too high to complete a full rep or too low to protect you.
Your environment will dictate your training longevity. A solid rack, proper flooring (usually 3/4 inch horse stall mats), and a decent barbell are the holy trinity of the garage gym. Once you have that locked in, the consistency follows naturally. There is no traffic on the commute from your kitchen to the garage.
Frequently Asked Questions
Do I really need to bolt my power rack to the floor?
Not necessarily. If you purchase a "flat-foot" rack, the extended base provides enough stability for most general lifting without bolting. However, if you plan on doing kipping pull-ups or using heavy lever arms, bolting the rack to the concrete is the safest option to prevent tipping.
What is the difference between a squat stand and a power rack?
A squat stand usually consists of two uprights and an open base, offering a smaller footprint but fewer safety features. A power rack (or cage) has four or six uprights connected by crossmembers, allowing you to lift inside the structure with safety bars on both sides to catch a failed lift.
Does a garage rack need special maintenance?
Yes, especially in humid environments. While many racks come with powder coating, raw steel parts or scratched areas can rust over time due to temperature fluctuations in a garage. Wiping down your equipment with a light oil (like 3-in-1 oil) and brushing chalk out of the knurling periodically will keep the steel in top condition.
