Stop Tripping Over Your Weights: The Ultimate Guide to Home Gym Organization
You have the bench, the mats, and a growing collection of iron, but walking through your workout space feels like navigating a minefield. Building a home gym is an investment in your health, yet organization often takes a backseat to buying new plates or heavier dumbbells. The result is usually a cluttered floor that kills your motivation and poses a genuine safety hazard. If you are tired of stubbing your toes or wasting time searching for the matching 25-pound weight, the solution isn't just "cleaning up"; it is about installing the right infrastructure to handle your equipment.
Organizing your lifting zone does more than make the room look good. It streamlines your workout flow. When every piece of equipment has a dedicated home, you spend less time shuffling gear and more time under tension. This guide breaks down how to reclaim your floor space and why proper storage is the unsung hero of a successful fitness journey.
My Battle with the Garage Floor
I learned the importance of organization the hard way. For years, my setup consisted of a mishmash of cast iron and rubber-coated hex dumbbells scattered across the corner of my garage. I told myself it was "hardcore" to keep things raw and rugged. That illusion shattered one Tuesday evening during a drop set. I stepped back after a set of lunges, my foot landed on a rogue 10-pound weight, and I twisted my ankle. I was out of commission for three weeks.
That downtime gave me plenty of time to stare at the mess I had created. I realized that my reluctance to buy storage wasn't saving me money; it was costing me workout consistency. The moment my ankle healed, I cleared the corner and invested in proper shelving. The difference was immediate. Not only was the floor safe, but the mental clarity of walking into a tidy space actually improved my focus during lifts.
Why Your Lower Back Needs a Rack
Beyond the tripping hazards, leaving weights on the floor is a biomechanical nightmare. Every time you start a set of heavy presses or curls, you have to deadlift the weight off the ground first. While deadlifting is a great exercise, doing it awkwardly with one arm just to get into position for a shoulder press puts unnecessary strain on your lumbar spine. This is where a dedicated fitness gear dumbbell rack changes the dynamic of your training.
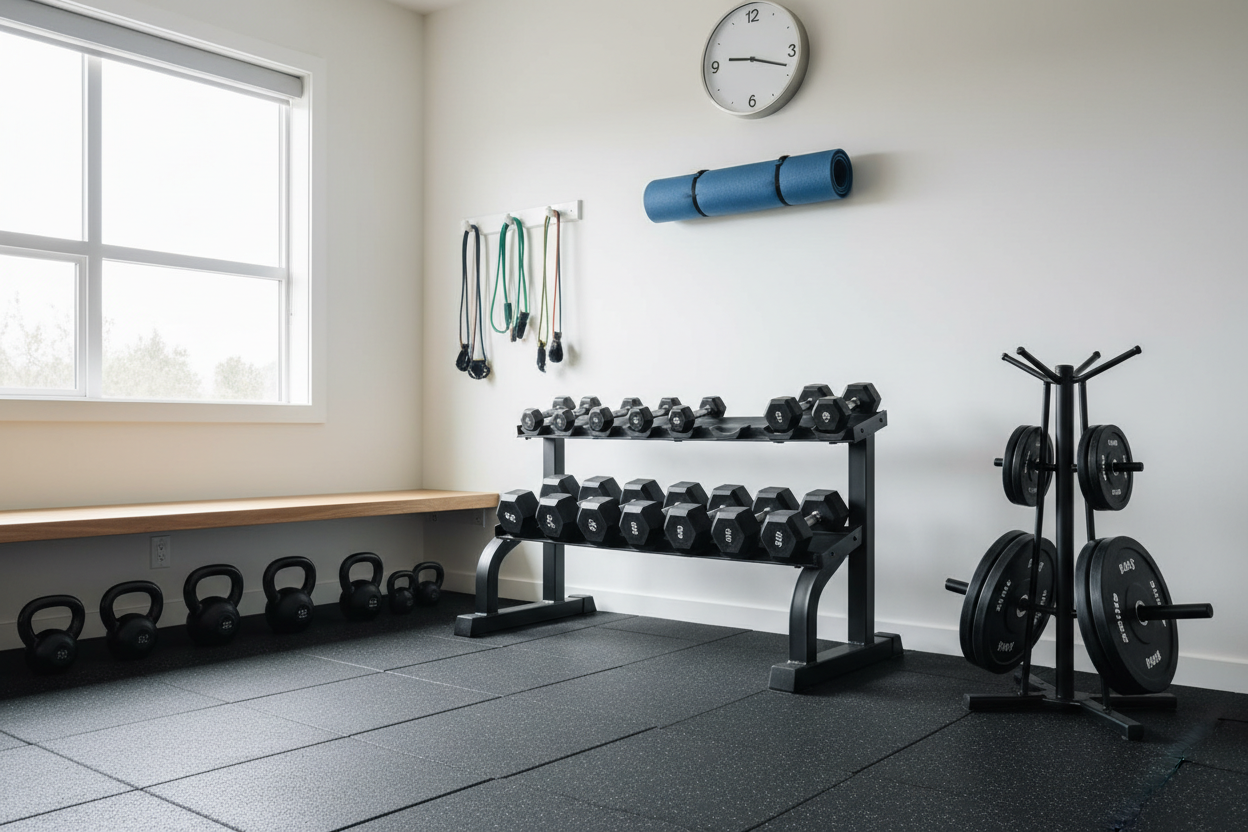
By elevating your weights to waist or knee height, you save your energy for the actual exercise. Racking the weights becomes a seamless part of the set rather than an exhausting chore. When looking for storage, prioritize racks with angled shelves. This ergonomic design allows you to grab the handle securely without pinching your fingers or twisting your wrist at an odd angle. It is a small detail that prevents cumulative fatigue over a long session.
Choosing the Right Storage for Your Space
Not all racks are created equal, and the footprint of your storage needs to match the reality of your room. If you are working with a tight spare bedroom or a single car garage bay, verticality is your best friend. A standard fitness gear weight rack often comes in various configurations, including A-frame styles or horizontal tiered designs. The A-frame is fantastic for smaller sets (usually 5 to 30 pounds), occupying barely more than a square foot of floor space.
However, if you are serious about progression, you likely have a collection that goes up to 50 pounds or heavier. In this scenario, horizontal racks are superior. They are more stable under heavy loads and prevent the weights from jamming against each other. Look for heavy-duty steel construction with a powder-coated finish. This ensures the rack can withstand the sweat, humidity, and the impact of racking heavy iron over the next decade.
The Heavy Lifter’s Solution
For those who have accumulated a full run of dumbbells—say, from 5 pounds all the way up to 75s or 100s—a standard two-shelf unit will run out of real estate quickly. You end up with the heavier bells on the rack and the lighter ones back on the floor, defeating the purpose of the purchase. This is where a fitness gear 3-tier dumbbell rack becomes essential. The third tier provides that critical extra layer of storage density, allowing you to stack a massive amount of weight in the same linear footprint as a 2-tier rack.
When setting up a three-tier system, organize by weight class. Place the heaviest dumbbells on the bottom shelf to lower the center of gravity and maximize stability. Keep the medium weights in the middle and your warm-up or accessory weights on the top. This arrangement is safer and makes the rack less likely to tip if you accidentally bump into it.
Protecting Your Equipment and Your Home
Storage isn't just about the rack; it is about preserving the longevity of your gear. Dumbbells left on concrete floors absorb moisture, leading to rust on cast iron handles or chrome plating. If you use rubber-coated weights, the rough concrete acts like sandpaper, slowly chewing away the protective coating. A rack keeps your equipment dry and off abrasive surfaces.
Furthermore, consider what sits under the rack. Even with rubber feet, a fully loaded rack exerts tremendous pressure on the floor. If you are on hardwood, tile, or even vinyl, place a high-density rubber stall mat underneath the unit. This distributes the weight and prevents permanent indentations or cracks in your home’s flooring.
Installation and Maintenance Tips
Building these units is generally straightforward, but a few tricks can make the structure more rigid. Do not fully tighten the bolts until the entire frame is assembled. Once the frame is standing, place it on level ground, then tighten each bolt in a cross pattern. This prevents the rack from wobbling or sitting unevenly. Periodically check these bolts every few months, as the vibration from racking weights can loosen them over time.
Organizing your gym is the single best upgrade you can make outside of the weights themselves. It transforms a chaotic room into a professional-grade sanctuary where you can focus entirely on your performance.
Common Questions About Gym Storage
How much weight can a typical home gym rack hold?
Weight capacity varies significantly by design and brand. A standard A-frame rack might hold between 300 to 500 pounds, while a heavy-duty 3-tier horizontal rack is often rated for 800 to 1,000 pounds. Always check the manufacturer's specifications before loading it with heavy dumbbells to prevent structural failure.
Can I store kettlebells on a dumbbell rack?
It depends on the shelf design. Racks with flat shelves can easily accommodate kettlebells, medicine balls, and dumbbells. However, racks with angled rails or specific "saddles" are designed strictly for dumbbells and may not provide a stable base for kettlebells to sit safely.
Do I need to bolt my weight rack to the floor?
For most residential dumbbell racks, bolting them down is not necessary because the low center of gravity and heavy load keep them stable. However, if you are installing a tall storage unit or have small children who might climb on the equipment, anchoring it to the wall or floor adds a necessary layer of safety.
