Stop Overpaying for Cable Machines: How Simple Shackles Transform Your Power Rack
Most home gym owners eventually hit a wall. You have the barbell, the plates, and a sturdy cage, but you find yourself missing the versatility of the cable machines found in commercial gyms. The assumption is that adding cable functionality requires buying a massive functional trainer or an expensive lat pulldown attachment. That is rarely the case. The most cost-effective solution is often sitting right in the hardware section of fitness websites, yet it gets overlooked constantly. By utilizing power rack shackles, you can unlock hundreds of isolation exercises without expanding your gym's footprint or draining your bank account.
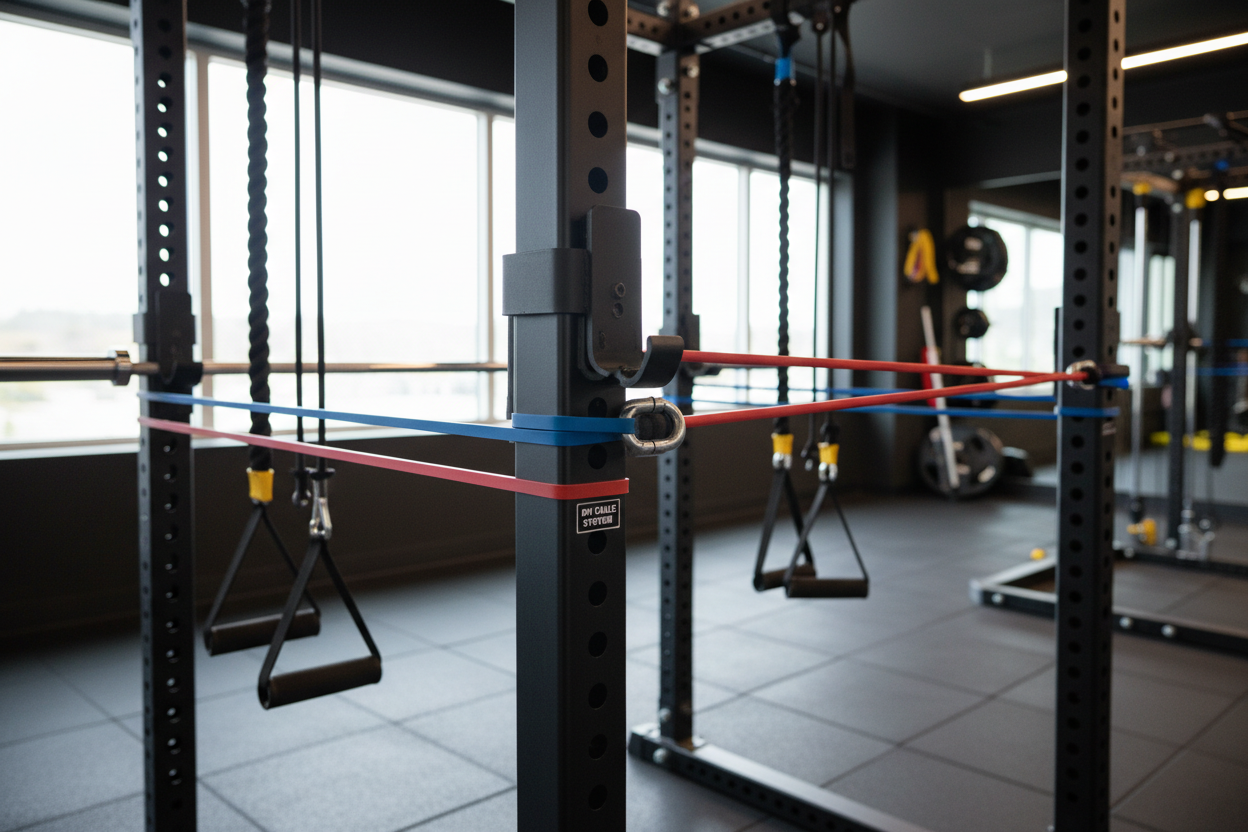
These small U-shaped or D-shaped metal attachments bolt directly into the holes of your rack's uprights or crossmembers. Once installed, they provide a solid, static anchor point. Unlike soft loops or nylon straps that can slide, stretch, or fray over time, a steel shackle creates a permanent mounting point for pulleys, resistance bands, and suspension trainers. If you are trying to replicate the feel of a commercial gym machine, rigidity is the secret ingredient, and these brackets provide exactly that.
Why Your Rack Needs Hard Mounting Points
I spent the first two years of my home training journey relying on climbing webbing and carabiners to rig up my pulley systems. It worked, technically. I could do tricep pushdowns and face pulls, but the experience was always slightly off. The nylon straps would slide along the top crossmember during heavy sets, shifting the angle of resistance. Worse, the friction eventually began to wear through the powder coat on my rack, leading to rust spots. The equipment felt temporary and amateur.
Switching to dedicated hardware changed the dynamic entirely. I installed a pair of shackles on the top rear crossmember and another pair at the very bottom of the rear uprights. Suddenly, the pulley system didn't sway or slide. The movement felt crisp, similar to a selectorized machine. It also saved setup time. Instead of tying and untying knots or adjusting straps, I could simply clip a carabiner into the shackle and start lifting. It is a small modification that makes a DIY setup feel professional.
Building a DIY Cable System
The primary reason lifters hunt for these attachments is to build a high-low cable setup. A standard power rack is just a steel box until you add mechanics to it. By placing power rack shackles at the highest point of your cage, you create an anchor for a high pulley. This allows for movements like lat pulldowns, tricep extensions, and face pulls. Because the shackle is bolted through the steel upright, it can handle significantly more load than a plastic-coated hook or a bungee cord.
The low pulley setup is where the stability really matters. When you perform a seated row or a bicep curl from the floor, the line of tension is often horizontal. If you use a strap wrapped around the base of your rack, it tends to ride up the upright as you pull. A shackle bolted into the bottom hole stays put. This allows for a true low row station where the force vector remains consistent throughout the entire range of motion.
Understanding Sizing and Compatibility
Not all racks are built the same, and buying the wrong hardware is a common frustration. You need to know two specific measurements: the size of your uprights and the diameter of the holes. Most modern racks are built with either 2x3 inch or 3x3 inch steel tubing. The hole sizing is generally either 5/8 inch (standard) or 1 inch (often called "monster" or commercial sizing).
If you buy a shackle with a 1-inch bolt for a rack with 5/8-inch holes, it won't fit. Conversely, using a 5/8-inch bolt in a 1-inch hole creates "slop." The attachment will rattle and shift under load, which can damage both the bolt threads and your rack's holes over time. Always measure the diameter of the holes on your specific rack brand before ordering. A tight fit ensures the safety and longevity of the equipment.
Accommodating Resistance and Band Work
Beyond pulleys, these attachments are essential for athletes looking to utilize accommodating resistance. This method involves using elastic bands to increase tension as you move through a lift, commonly used in powerlifting to build explosive strength. To do this safely, you need to anchor the bands to the bottom of the rack for squats or bench presses.
Many racks come with band pegs, but these long metal rods can be a hazard for your shins when you are walking around the gym. Shackles offer a lower-profile alternative. You can leave them bolted to the bottom frame permanently. When it is time to squat, you clip the band to the shackle and loop it over the bar. There is no risk of the band slipping off a peg, and when you are done, the attachment remains out of the way, posing no tripping hazard.
Suspension Training and Gymnastic Rings
Suspension trainers, like TRXs or gymnastic rings, require a high anchor point. While you can throw the straps over a pull-up bar, this often interferes with other exercises. If you want to do pull-ups, you have to take the rings down. By installing shackles on the sides or interior of your top crossmembers, you create a dedicated station for bodyweight rows, ring dips, or suspended pushups.
This setup also reduces wear on your suspension straps. The metal edges of a square tube rack can be sharp enough to cut through nylon webbing over months of friction. A shackle usually features a rounded edge or provides a connection point for a carabiner, meaning the fabric of your expensive suspension trainer never grinds against the abrasive powder coat of the rack.
Safety Considerations and Weight Ratings
While these attachments are small, they are bearing significant loads. It is vital to check the weight rating provided by the manufacturer. A piece of hardware designed for a 50lb resistance band might not hold up to a 300lb low row. Look for shackles made from heavy-gauge steel with high-tensile bolts. The bolt itself is usually the strongest part of the equation, but the weld points on the bracket need to be inspected regularly.
Installation should always include washers on both sides of the rack upright to protect the finish and distribute the clamping force. Tighten the nuts securely, but check them periodically, especially if you are using the rack for vibration-heavy exercises like kipping pull-ups or dropping heavy deadlifts. A loose shackle can damage the threads of the bolt or the hole in your rack.
Upgrading your home gym doesn't always require a freight shipment and a thousand dollars. sometimes, it just requires the right connection points. By integrating power rack shackles into your setup, you bridge the gap between a basic squat stand and a versatile strength training center.
Frequently Asked Questions
Can I use shackles on a rack that isn't bolted to the floor?
Yes, but you must be careful with the direction of force. If you attach a pulley to a high shackle and pull outward rather than straight down, or use a low shackle for heavy rows, you risk tipping the rack if it isn't weighed down or bolted. Always use counterweights (plate storage) on the rack if it isn't anchored.
Do I need to buy shackles from the same brand as my rack?
Not necessarily. As long as the pin diameter (e.g., 5/8" or 1") and the width of the shackle match your upright size (e.g., 3x3"), brands are often interchangeable. However, always double-check the width measurement, as some 3x3 racks use metric sizing (75mm) which can cause fitment issues with imperial attachments.
Can I use these for hanging a heavy bag?
While possible, it is generally better to use a dedicated heavy bag hanger. Shackles are designed for static loads or linear pulls (like cables), whereas a heavy bag creates dynamic, multi-directional swinging forces that can loosen standard bolts quickly and cause significant vibration throughout the entire rack.