From Living Room to Lifting Room: Building Motivation and a DIY Power Rack at Home
There’s something magical about taking control of your own fitness journey—not just the workouts, but the whole environment you train in. When you build your own space, from choosing the floors to adding equipment, you’re crafting a personal fortress of motivation. One way to truly commit is to create your own homemade rack, so you’re ready to lift whenever inspiration strikes.
Why Your Training Space Matters
Your workout environment can make or break consistency. Whether it’s the corner of your garage, a spare bedroom, or part of the garden shed, having a dedicated spot helps you mentally shift into workout mode. I’ve seen clients suddenly go from struggling to train twice a week to hitting four sessions steadily, simply because they made their training corner feel like their own.
Building Strength Physically and Mentally
Creating a homemade rack is more than just putting pieces together. It’s a project that builds ownership of your routine. Research shows that autonomy and personal control can significantly increase adherence to fitness habits. If you’ve ever assembled furniture, you know there’s a mental boost when you step back and admire something you’ve built yourself—it’s the same with fitness equipment.
Power Rack DIY: Getting Started
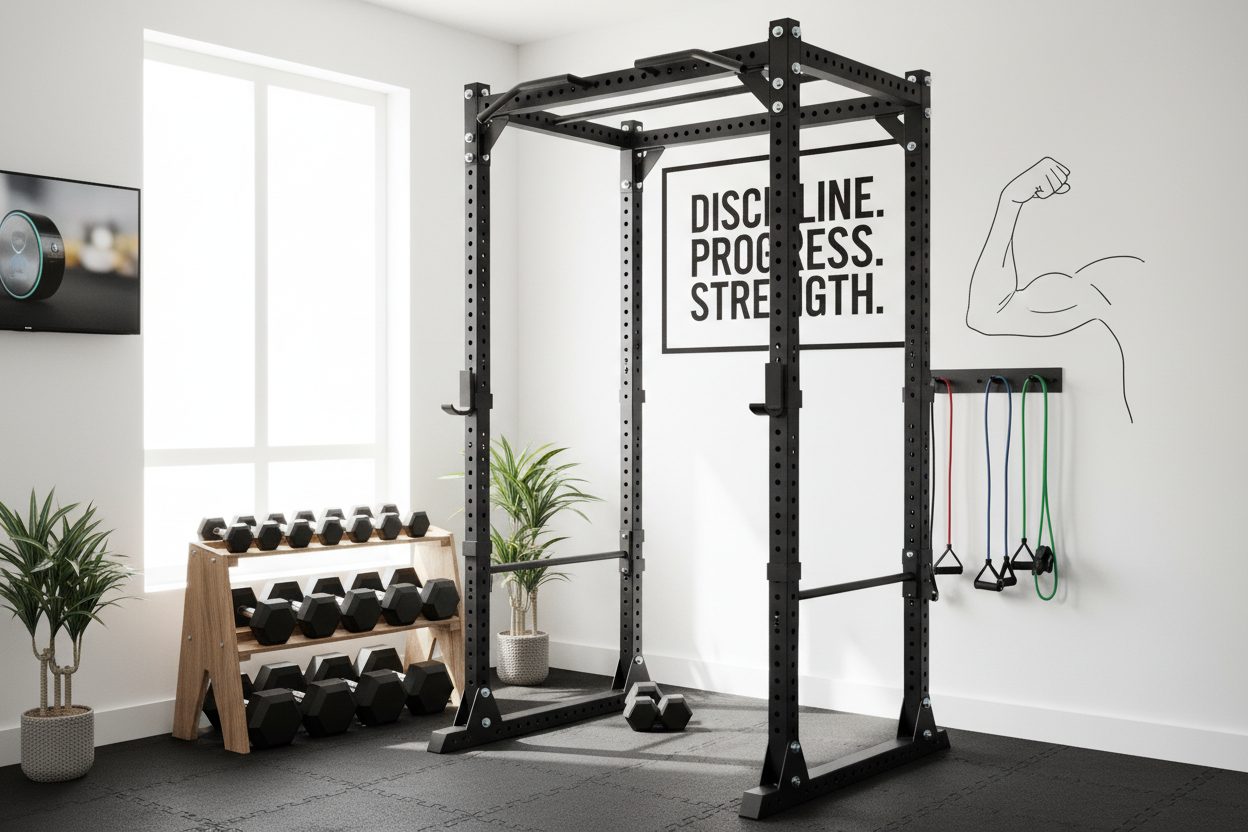
The idea of a power rack DIY project might sound intimidating, but it’s achievable with the right mindset and planning. A power rack is essentially a sturdy frame designed to hold a barbell safely for exercises like squats, bench presses, and overhead presses. If you’re going down the DIY route, your priorities should be safety, stability, and durability.
How to Build Power Rack Safely
Begin with an accurate design plan. Make sure your measurements suit your height and space. Use strong, reliable materials such as structural-grade timber or steel if available. Pre-drill holes for bolts to keep joints secure and avoid splitting wood. Components you’ll need usually include upright posts, crossbeams, and safety pins or bars. Remember to check weight capacity before putting it to use—this isn’t an area to cut corners.
I recall making my first homemade rack when gyms were closed. It was in a tiny garage and built from timber beams from a local DIY store. I sanded the uprights, painted them for a clean finish, and bolted on simple steel brackets to hold the bar. It wasn’t flashy, but every time I stepped into that rack for squats, I felt proud and energized. That pride kept me training consistently.
Making It a Part of Your Routine
Once you’ve got your rack set up, integrate it into a structured program. Start with basic compound lifts two to three times per week, gradually increasing load while monitoring form. Evidence suggests that tracking your progress—whether via a journal or app—helps sustain motivation over the long run.
The Motivation Factor
Building your equipment adds a layer of commitment, but motivation comes in waves. On tough days, remind yourself of the effort you put into creating that space. Even on days you’re tired, stepping into your rack and doing a light session can keep the habit alive. Short sessions count, and the more you keep that mental promise to yourself, the stronger your discipline becomes.
Safety First
While DIY projects are rewarding, never compromise safety. Ensure the rack is secure, on a level floor, and tested with a lighter load before using heavy weights. Always have a spotter when pushing your limits, especially in a homemade setup.
Combining Your Homemade Rack with Other Training Methods
You can mix traditional barbell lifts with resistance bands, bodyweight exercises, and mobility work. This keeps training varied and avoids overuse injuries. Your power rack can be the central hub in a balanced fitness approach, offering versatility for both strength and conditioning.
Final Thoughts
Building a DIY power rack isn’t just about saving money—it’s about building a lifestyle. By designing and constructing your own equipment, you’re investing in yourself, both physically and mentally. That sense of accomplishment will drive you to keep training, even when life gets busy. You’ll not only have a piece of equipment tailored to your needs, but a tangible reminder of your dedication and resourcefulness.
